

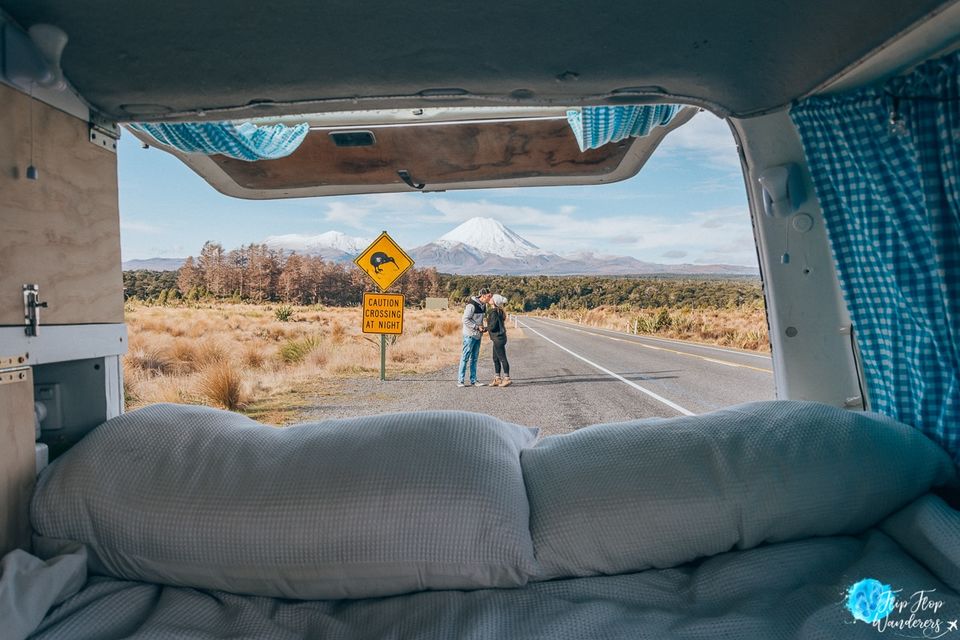
So you wanna live the van life? But you don’t have much money or tools for it? Isn’t it going to be difficult to live that life then? Not at all! In reality, living in a campervan is actually much cheaper (and way cooler!) than living in hostels/apartments all the time!
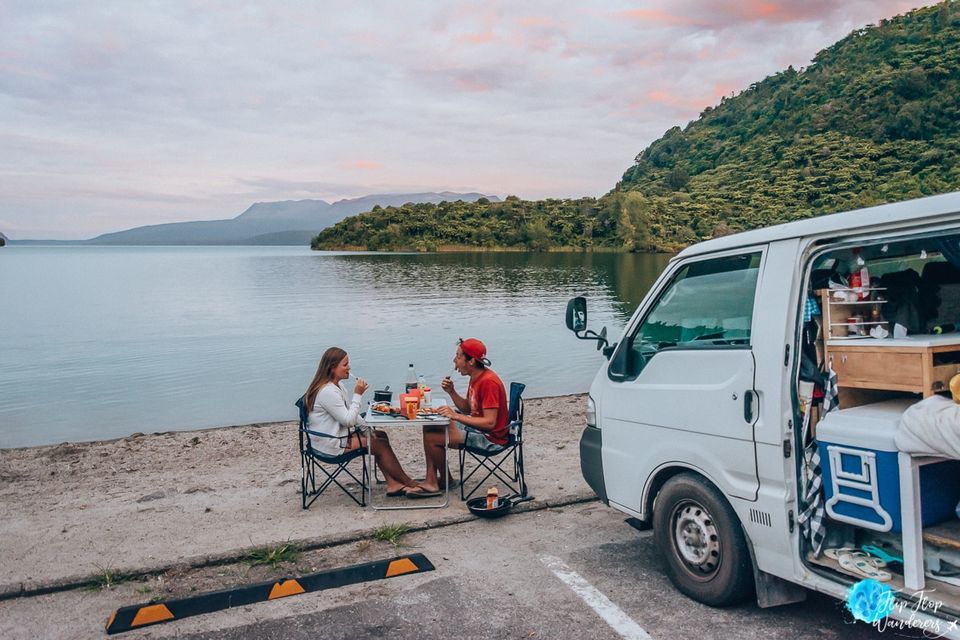
And what is cooler than road tripping? In our opinion, this is the best way to experience a country. Therefore, when we arrived in New Zealand last year (November 2017) we immediately bought a cheap, empty van with the idea of completely building the interior ourselves. Fast forward three months and we converted it into a perfect, small liveable house! The best part is: we did this all on a very small budget! Buying the empty van and converting it ourselves was actually much cheaper than when we would have bought a backpacker van that was already done. And now we even have our very own interior in it, how we love it! This was our very first time doing this and we didn’t even use that much tools either.
So if we can do it, you can do it too!
In this article, we’ll show you exactly how we built our DIY campervan cheap and teach you step-by-step how you can do it too! Plus we even included a FREE checklist at the bottom of this blog to make sure you did and thought of everything when building your own campervan!
Why building your own campervan
Why would you build a campervan yourself when you can buy backpacker vans that are already done? This question might pop into your head when you're deciding to buy a campervan. Why would you go through all that trouble of building it? We get you and it is a fair question to ask. Let us first say that there is nothing wrong with buying a completely done backpacker van, where you can travel around with immediately, especially if you have little time. This is the way we also did it for several years before and we loved traveling around that way!
But there are a few benefits of converting an empty van yourself:
- It's cheaper than buying a completely done campervan! We noticed this when looking on boards online. Backpackers that are selling their van are usually asking hundreds if not thousands of dollars more for their van where you can travel in right away. Often those are old vans with a lot of km's on it. When looking to buy an empty van from a cheap car dealer, we noticed that they were much cheaper and years younger vans too. Ours didn't even have much km's on it. So you even have better value for your money too!
- You can build it completely how you want! Not really liking the interior from the van you bought? Or you think you have way too little storage place under the bed? With your very own van, you can make the interior all by yourselves. This way it is completely adapted to your needs and therefore you'll be much more happy with it afterward!
- It is a good way to gain some building skills. Learning new skills is always a benefit right?! With small projects like this, you'll learn how to use tools properly, how to build a bed an even how to fit it all in such a small space. For us, it didn't even matter if something went wrong, because we were only learning from it and every little misshape in the interior is only a memory of the cool project we did ???? It makes it unique!
- After the makeover, the van will be worth more and so you will be able to sell it with some profits! The better you build it, the better it sells!
Campervan conversion inspiration
So you decided to build your own campervan. Now, where is the best place to get inspiration from? For us, we got the most inspiration out of Pinterest. There are literary tons and tons of images and websites on there that show examples of how people can transform a tiny space into an amazing little home!
Another good idea is to scroll through Instagram profiles of people who've spent a lot of time and effort (and probably money) to create the most beautiful campervans.
There are also some websites which we found very useful when building our campervan:
Note: while you can make a really luxurious campervan complete with everything, and you'll definitely see that on some Pinterest or Instagram profiles, this is absolutely not necessary! You don't have to spend thousands of dollars on your van. Our campervan, for example, is not luxurious at all. Of course, it is luxurious in the way that you can say that we have a comfy bed, storage space, a small kitchen and some power points, but that's about it. We don't have insulation in our van, we don't have a generator, we don't have skylights and we don't have a toilet. All these things were simply too expensive and too much of an effort.
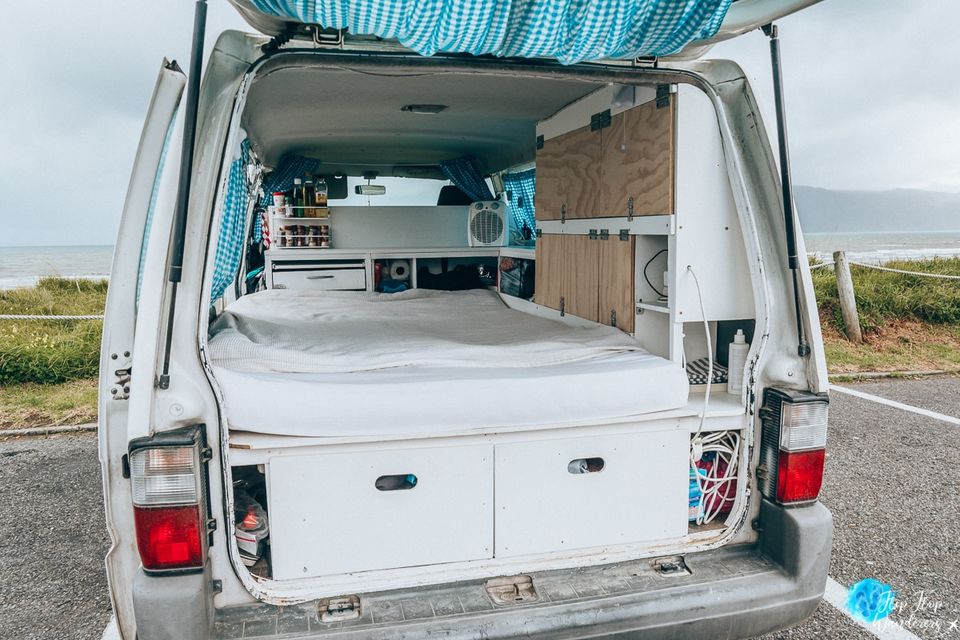
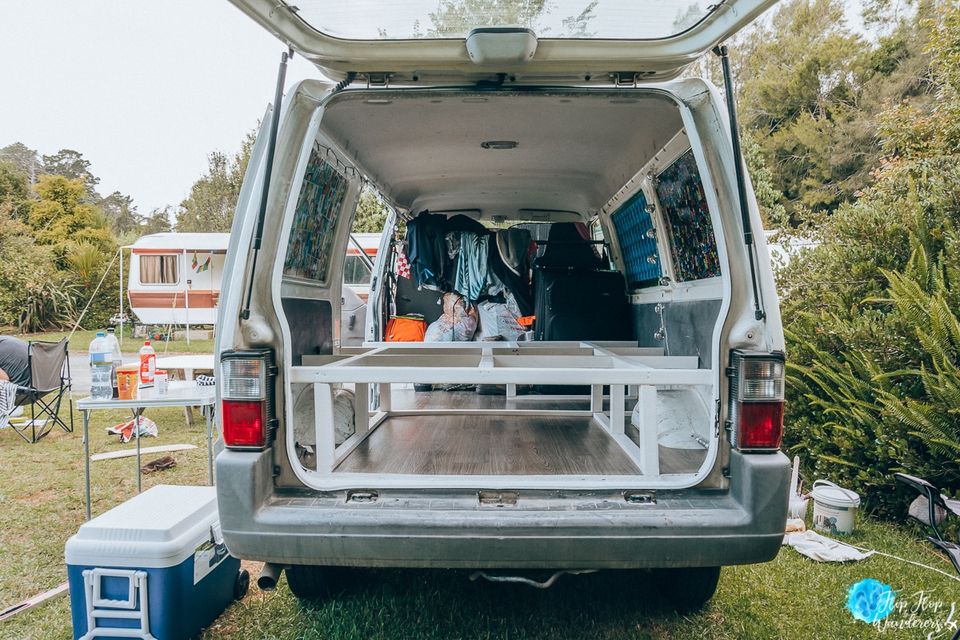
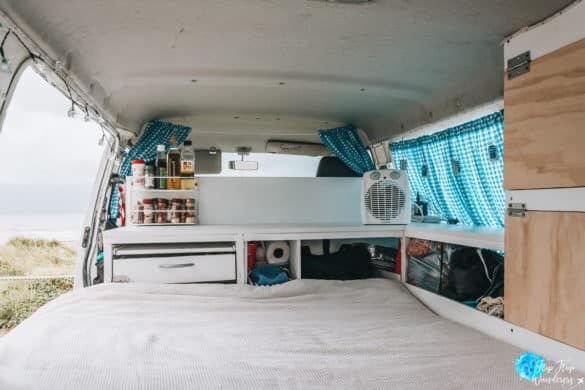
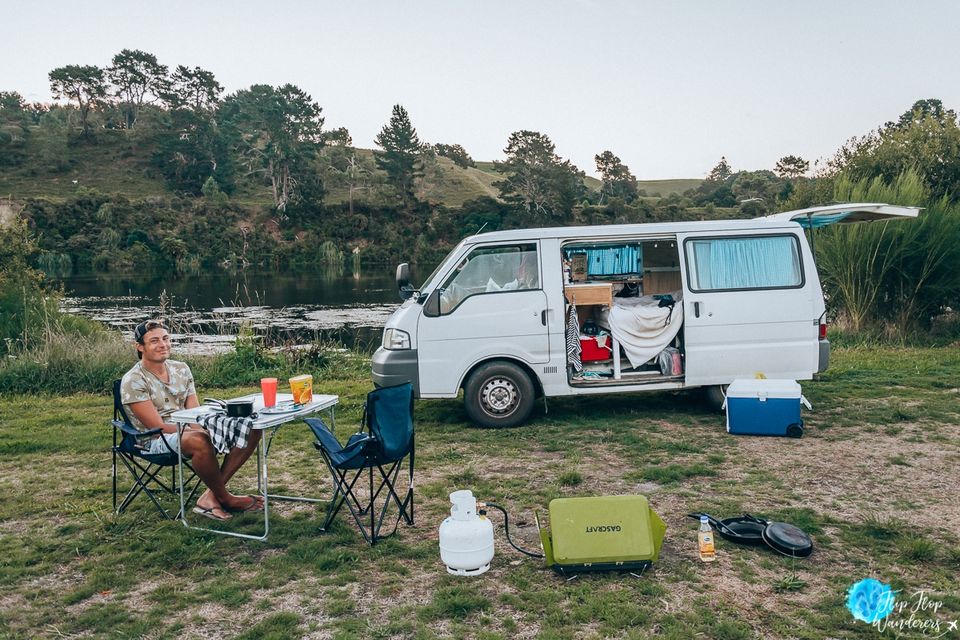
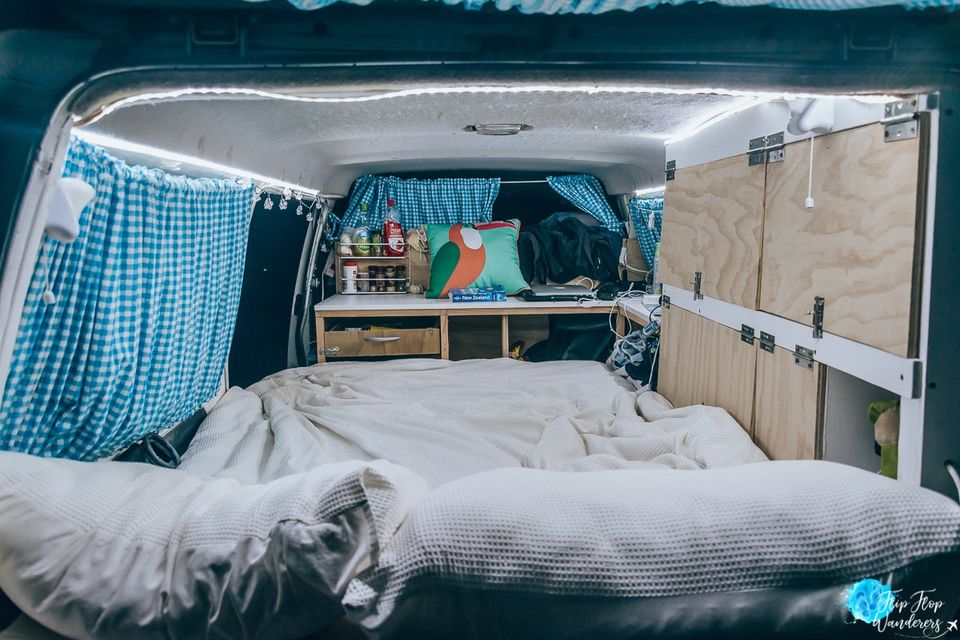
Below is the final product of our campervan. We are so incredibly happy with our little house and feel so at home in it! We are also pretty proud that we really made this ourselves! Who would have thought that we could be this handy?!

Here you can see a funny timelapse of how we built part of our van:
So let's get on with how you can build a campervan like this (or an even better one) too! We'll go over it step by step and show you exactly how you can make your own little house, with photos and a lot of tips!
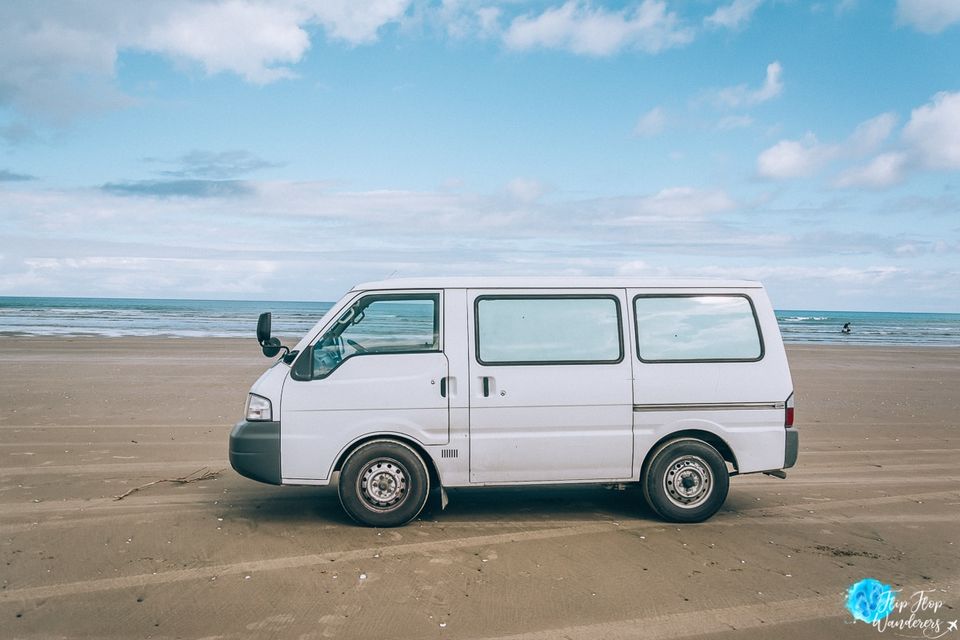
Step 1. Buy a van
Before you can convert a van into a campervan, you will need a van, duhh ???? Decide what your budget is and then the best way is to look online first. Look on several online marketplaces or Facebook pages. This is a good way to check what is available and you will be able to find out what you can get for your budget. There are loads of cars and vans available, so you will have to make up your mind what you are looking for. Do you want a normal van, or maybe a 4WD, or do you want one with a pop-up roof?
After comparing you can decide to buy from a private seller or from a dealer. We decided to go to a dealer this time because he had a couple of vans we could check out. But also a private seller is a good choice. We bought from private sellers (other backpackers) both times in Australia. You have to be careful with both options, there are many honest private sellers and dealers, but there are also less honest ones. If you go for a dealer, check out some reviews first.
There are some critical points you need to check before buying. The van can be cleaned beautifully and look like new, but that doesn't mean it is in a good condition. Check out the following points:
- Registration and roadworthy: Check the rules in the country or state of buying to see if it complies.
- Manufacturing year: The older the van, the more trouble you might get, I would advise younger than 15 years.
- Mileage: If it has really high mileage then it might have had its best time already.
- Maintenance: Best for a car is that it has been serviced every 10.000 to 15.000 km or every 6 months.
- Engine: Check for leakages, the belts and for weird noises.
- Body: Check if the chassis isn't rusty or bent.
- Tires: Check the condition of the tires, because they are expensive to replace.
- Test ride: Listen to the engine, check the color of the fumes, check every door and window and the lights etc. Check the brakes and swift to all gears.
When you check all of this, your van is probably in a good condition. There can sometimes still be issues that you might not notice, but with these checks, you covered a lot!
Costs:
Costs of our van: 4,250 NZD
Warrant of fitness (if due): 50 NZD
Registration costs (if due): 120 NZD for 1 year
How long did it take:
Depending on the market, for us 1 week
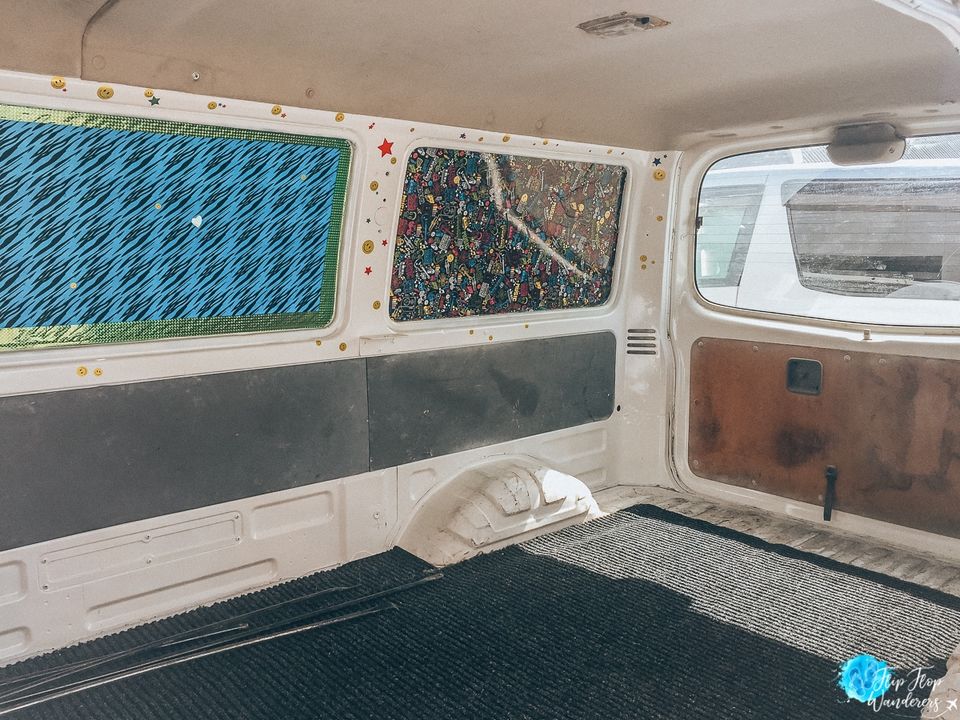
Step 2. Clean it
So you bought your van? Now it's time to give it a good clean first. It's still empty which means you can easily reach everything and you might not be able to clean some spots later when it's build up. And if there are some things in there that you won't need, get rid of it now!
Costs of cleaning:
20 NZD for cleaning gear
How long did the cleaning take:
2 hours
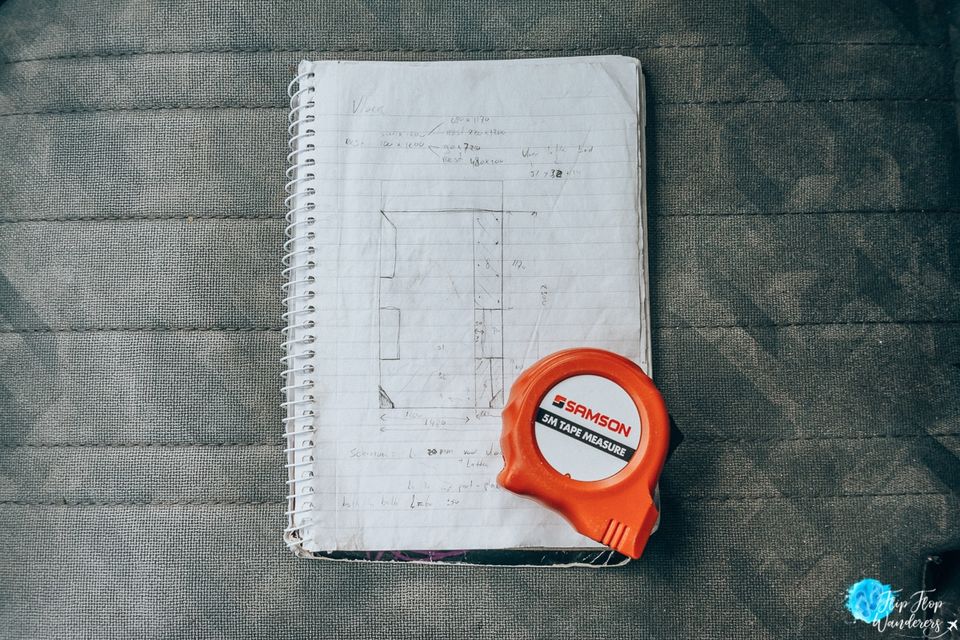
Step 3. Take measurements
You need to know the exact measurements so you can make a plan. Buy a tape measure and a spirit level. Although there are all kind of corners and protrusions, you will need to measure almost everything so you won't get any trouble with building later. It will be impossible to measure it all though, so mark the spots you can't measure so you won't forget them.
Also, check all the parts that should be movable. A van often has the engine underneath the front seats, so make sure you know how those seats fold up. The battery is often underneath the back of the driver's seat so make sure you know where because it will be critical for your design.
Step 4. Make a plan
Now it's time to make a design for the van, but how do you choose the best? What will be able to fit in it, and what won't? Do you need a bathroom? Do you want to cook inside? How much storage do you need? What 'furniture' is available?
This is the most important part of building a van. A good plan will save you a lot of time and trouble. The best way is to start thinking about the essentials:
- The bed: What size do you want it to be and what kind of mattresses are available? Where do you want to position it in the van, front or back? Consider the pros and cons for the positions. Do you want to make it foldable or partly removable to make seating in the van?
- The kitchen: What do you want in your kitchen? Do you want a sink and (waste)water tanks? Do you want to cook inside? Do you want a fridge or a cool box? How big is the equipment that you want to put in the kitchen?
- Storage: How much storage do you need? You might need more than you think because you collect a lot of stuff during traveling. One of the best places to create storage is underneath the bed. And maybe next to the bed too, depending on the width of the bed and the width of your van.
- The bathroom: Do you want a bathroom or a portable toilet? Where would you like to make it and how much room do you need for it?
- Electricity: Do you want some electrical outputs? Or do you want to use an extension cord with a power strip? Do you want a second battery and maybe some solar panels too?
- Resources and tools: What kind of materials are available and what tools do you want to use/are available for you? Is it possible to make the things that you designed? Do you want to buy some tools or hire/borrow them?
Start drawing out a design using the measurements you took in step #3. For this, we used a free trial of Sketch Up which is great to get a 3D view of what you want.
We will take you through all our decisions in the next steps of building the van.
Step 5. Optionally: make insulation
Depending on where you are going to travel in your van you might want to install some insulation. You can put this on the bottom and on the sides and the roof of the van. We decided not to do it. The floor had some carpet on it already and we were not able to insulate the sides and roof. The cold will come in any way since you need some fresh air in it, and the windows are not isolated either.
If you decide to isolate the van, this will be the first thing since it will be underneath the floor and behind the walls and ceiling. The floor is easy, just cut the insulation material so it covers the whole floor, and put the floor on top (see next step). If you decide to do the sides and roof too, you will need to cover this up by some walls and ceiling.
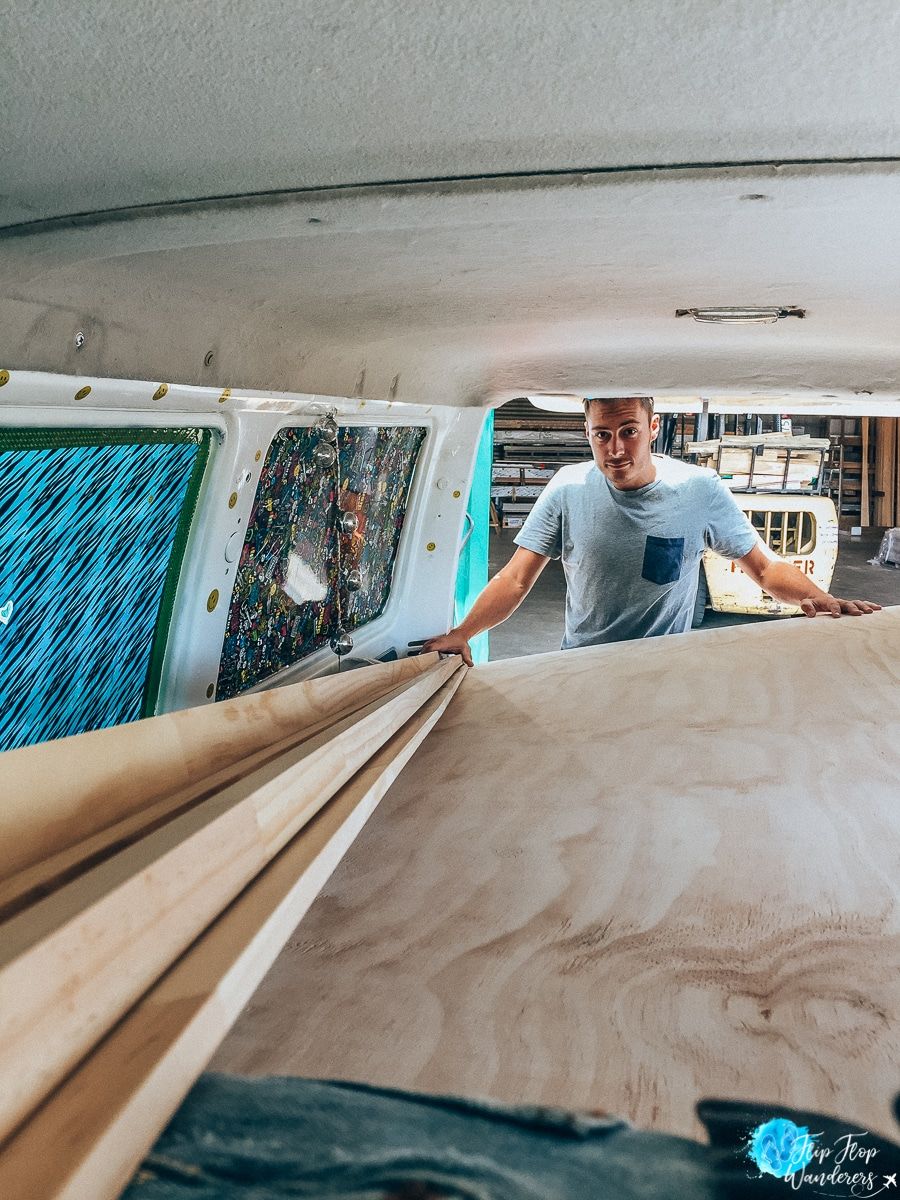
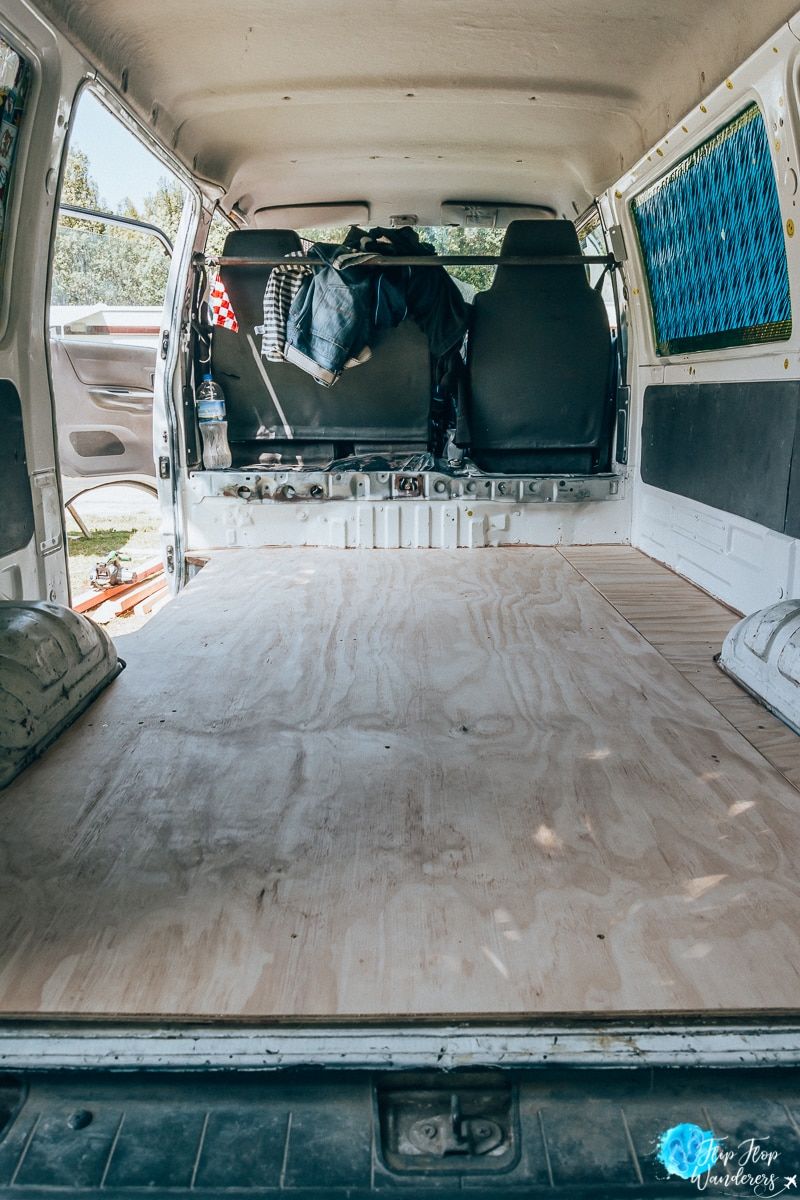
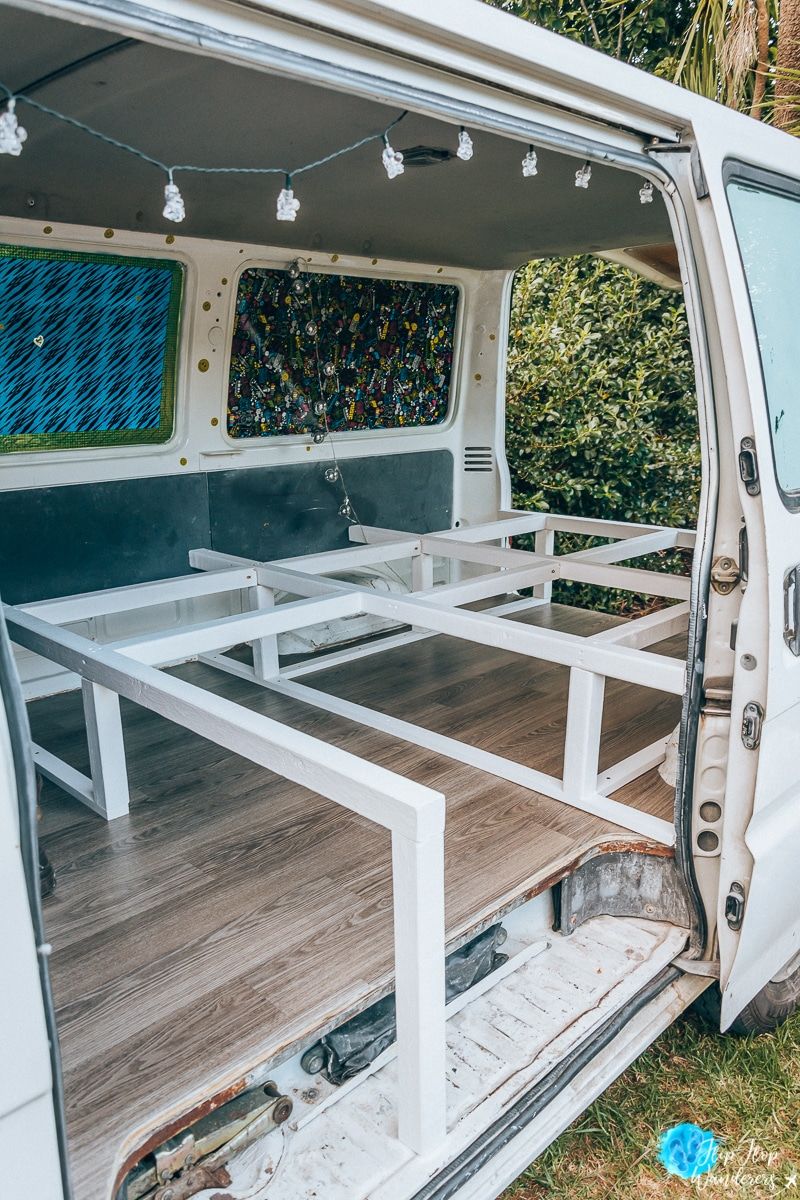
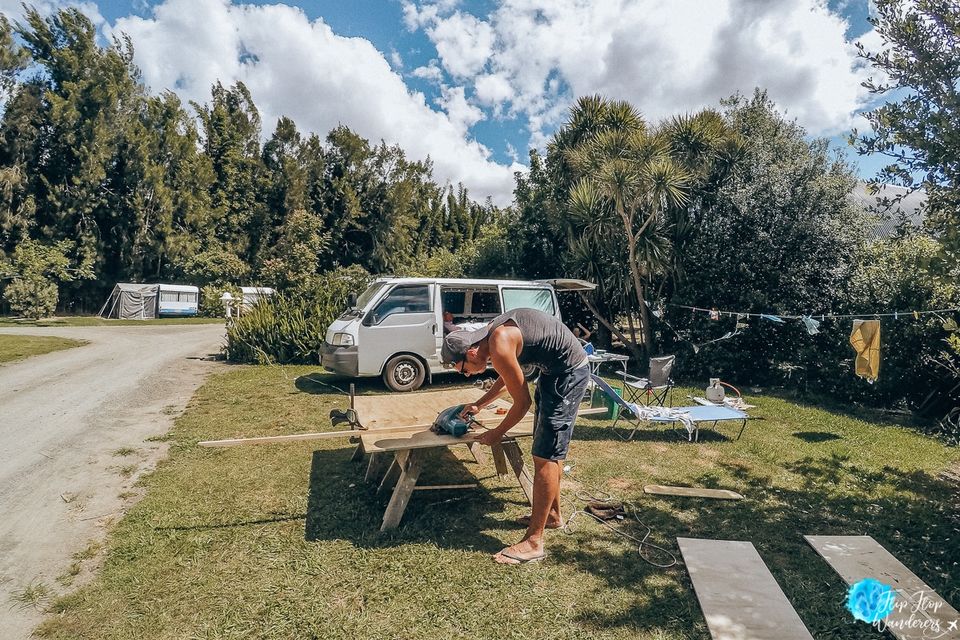
Step 6. Flooring
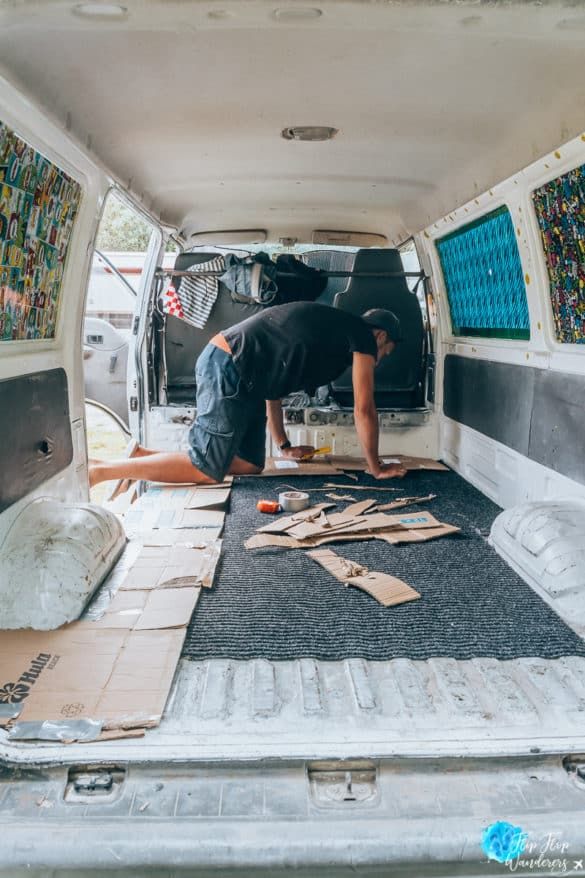
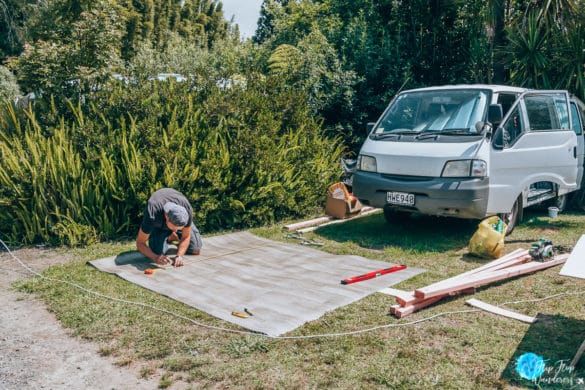
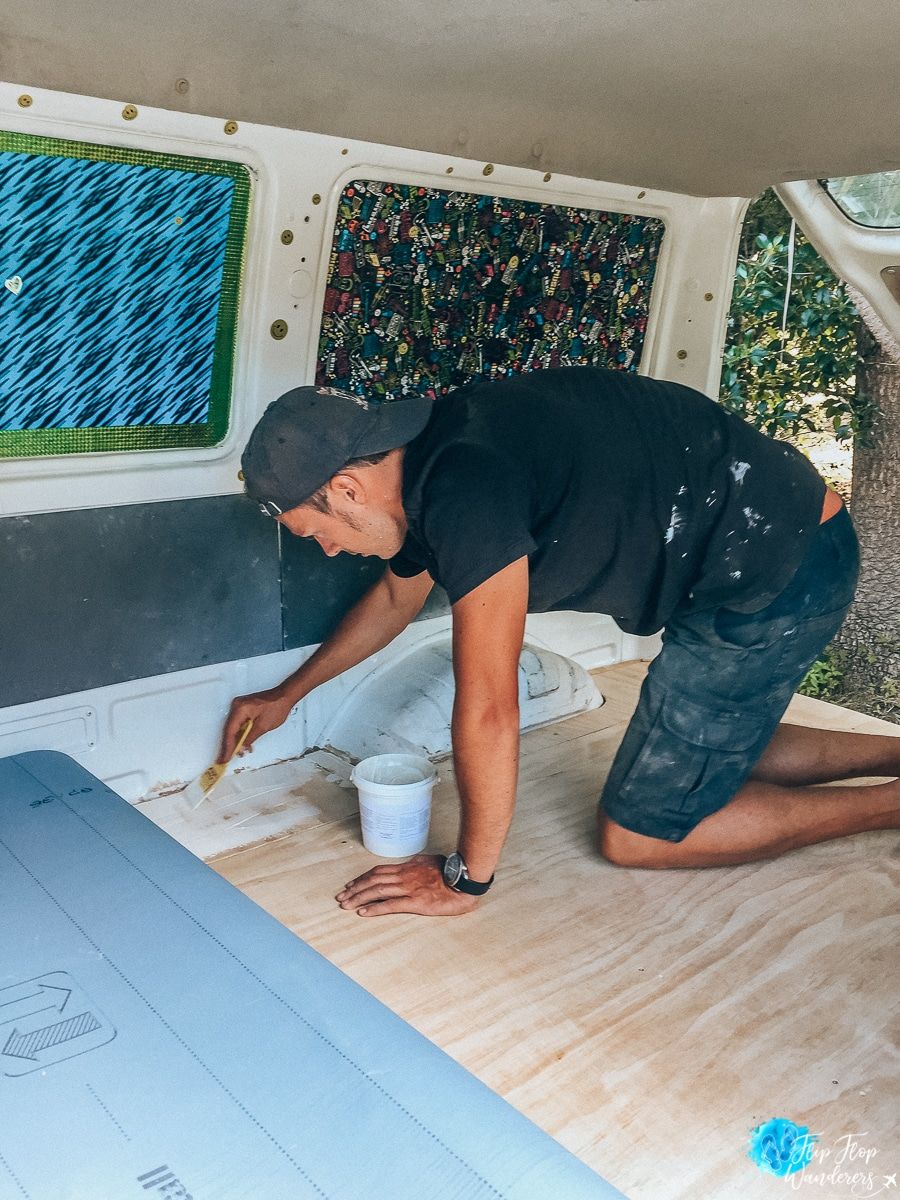
The first thing to start with is the floor. If there is already some carpet on the floor of the van you can leave it there. The floor will be the base of the whole camper so it's good to make a plywood bottom in it, just like we did. This will make it easier to fasten the frames for the bed, kitchen, and cabinets later. We first made a mold from cardboard. Although we measured the whole floor, it's impossible to measure all the bends and corners. Use a jigsaw to cut out all those bends and corners. Then drill through the wood and the bottom of the van and fasten it with screws. Be careful where you drill and fasten the floor because there might be some hoses and tubes underneath the van which you don't want to damage.
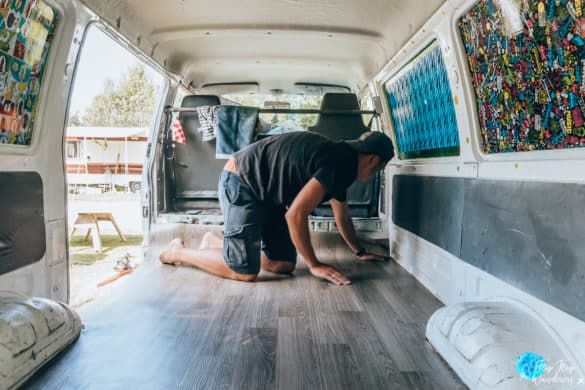
To make it look nice you have a couple of options. You can paint the plywood, or you can cover it with a carpet or a vinyl floor. We chose the last option because it looks really nice. Since we only needed to cover a small surface, we asked for some offcuts at a flooring company. This made it really cheap for us to put the floor in and it's easy to fit. You have to cut it to the right size first and then you use a special glue to attach it to the floor.
Costs of the floor:
Plywood: 60 NZD Vinyl floor: 40 NZD
How long did the flooring take:
8 hours (1 day)
See here the progress of our floor:

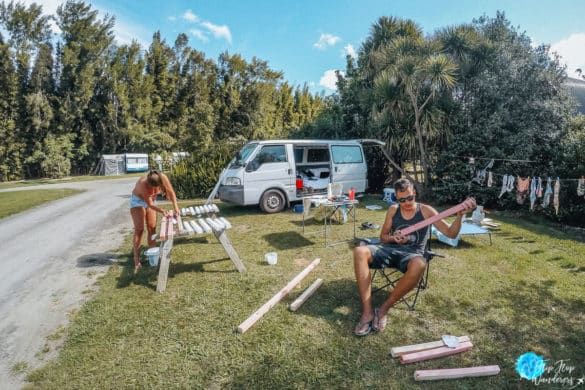
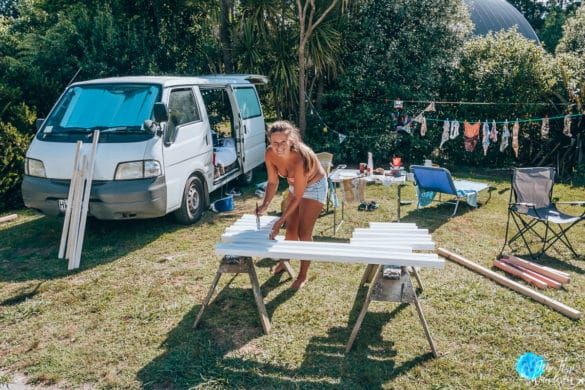
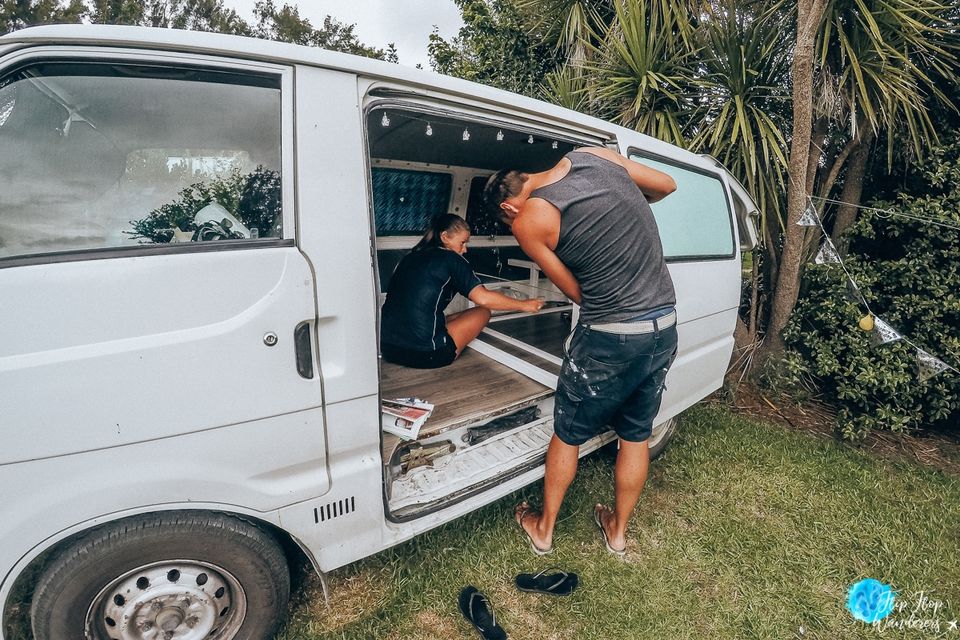
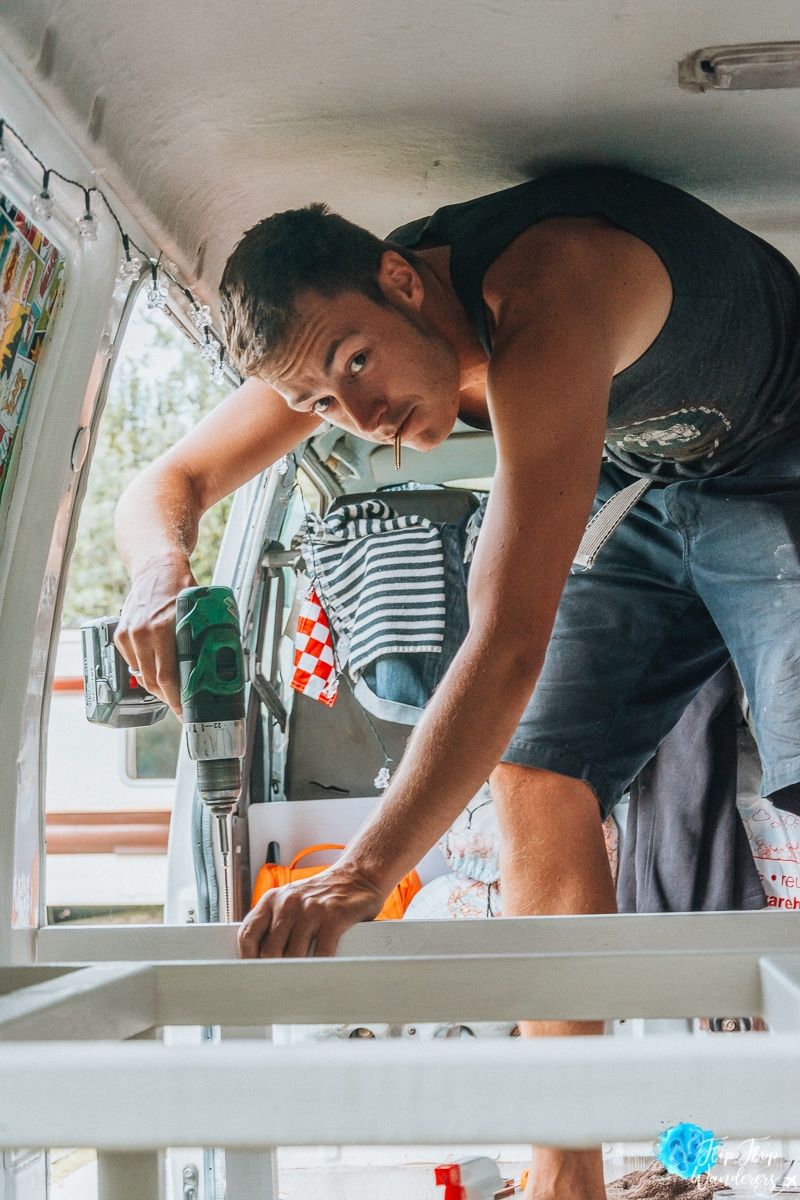
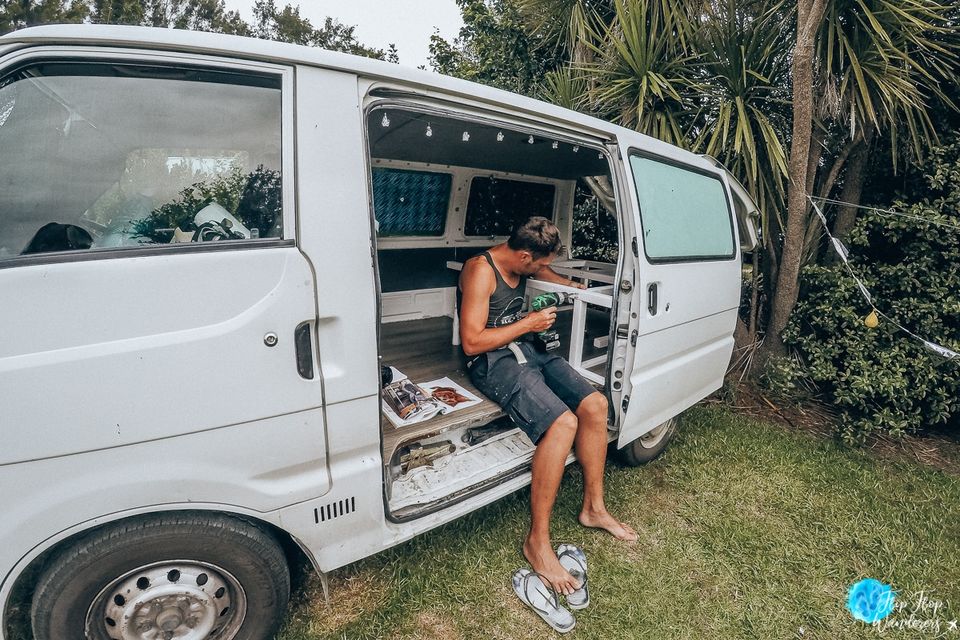
Step 7. Build the foundation
After the flooring, it's time to build the foundation/framing. Since we were living in the van while building it, we did it step by step. We decided to make the bed in the back, so we could make some big drawers underneath to put all our clothing in. Our opinion is that this is an easier way than making a storage room underneath the bed that you will need to lift up all the time when you need something.
We already bought a mattress, a three quarter. It's cozy, but wide enough (120cmx190cm). We put the bed all the way to the side of the sliding door, so we could make some cabinets on the other side of the bed. But first, we built the frame. We used thick beams for it (40x40mm) to make it solid, and attached some slats to the flooring to build the frame aside from the drawers.
We chose for 2 drawers that would go out of the back, and one drawer that would slide inside the van at the sliding door. This third drawer would be half the width of the bed and we cut out the other half of the bed bottom so it's removable and we are able to sit there.
The height of the foundation was based on the height of our upper body, so that we are still able to sit on the bed (about 80cm from the top of the mattress to the ceiling). We decided to wait with the framing for the cabinets and the kitchen until we finished the bed.
Costs of the framing:
Beams & slats: 150 dollar
How long did it take to make the foundation:
8 hours (1 day)
See here the progress of us building the foundation:
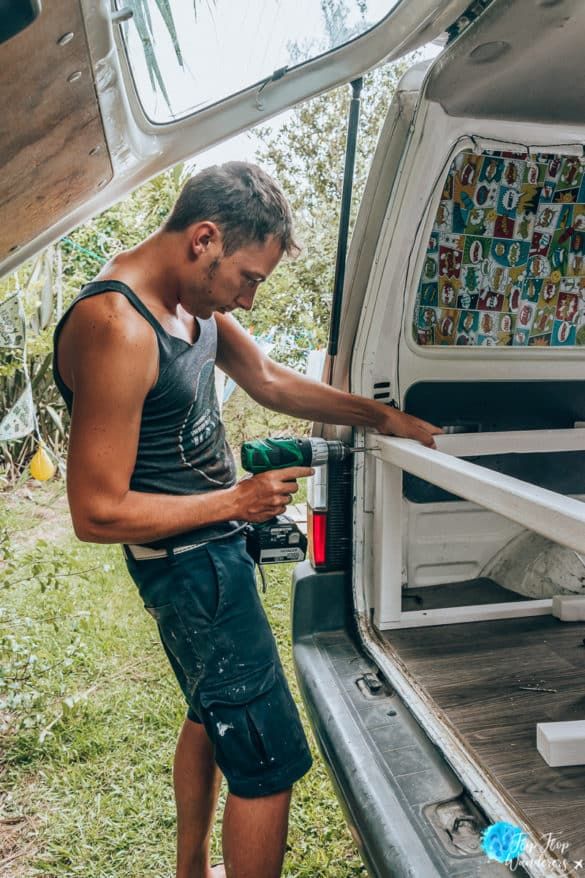
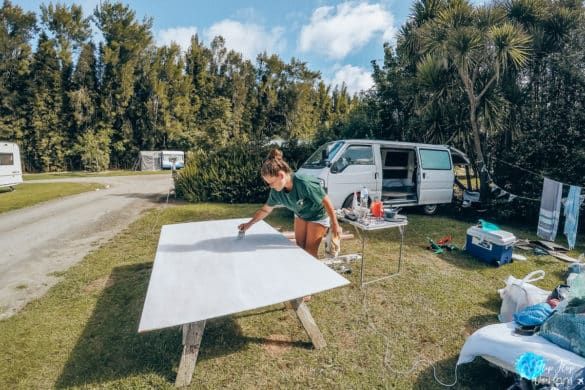
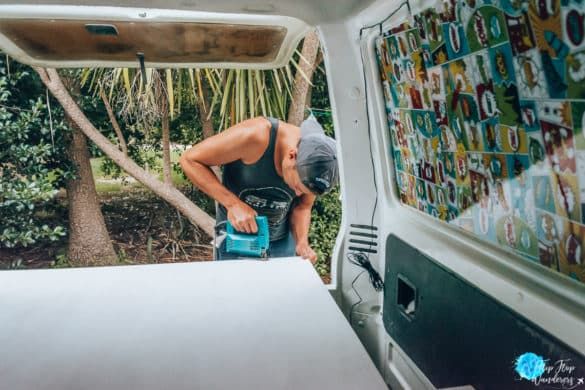
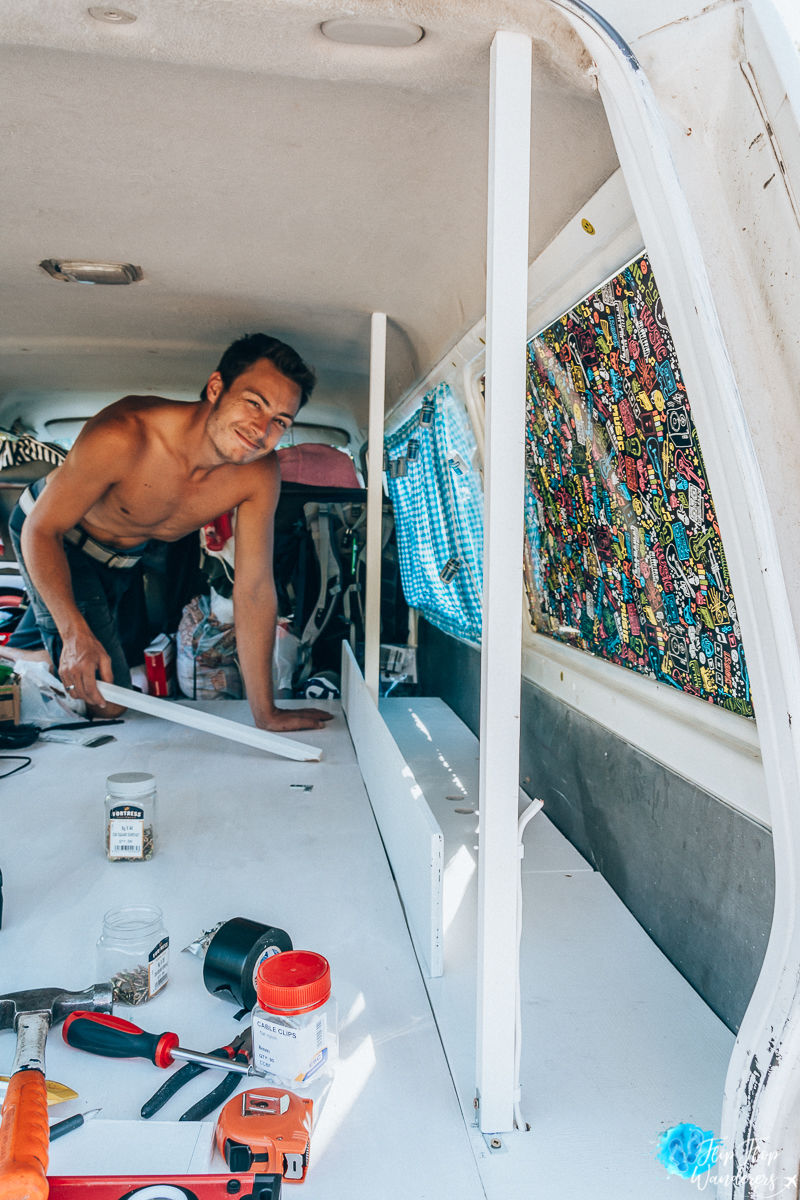
Step 8. Build the interior
The bed and drawers:
After the framing is done we first made the bed bottom. We used a 9mm plywood plate for it and shaped it to the right form of the bed and the van.
As said, underneath the bed will be two big drawers sliding out of the back of the van. We chose to make two of them because just one would be too heavy. They are made from 12mm plywood with two smooth slats on the bottom to slide like skis over the flooring and we used a bit of surfboard wax to make them slide easier. If you pull them out almost to the end they won't fall out because they will be supported by the solid framing of the bed. The drawers are just as deep as from the back to the opening of the sliding door.
At the end of the bed (in the middle of the van) we made another drawer underneath the bed which slides over the width of the van. This one is almost half the size of the van. To be able to reach this one, we made a cut out in the bed bottom. You can easily remove this part so you can reach inside the drawer, and this will also be the room to sit inside.
Costs of the bed and drawers:
Bed panel: 40 NZD Drawers: 110 NZD
How long did it take to make:
8 hours (1 day)
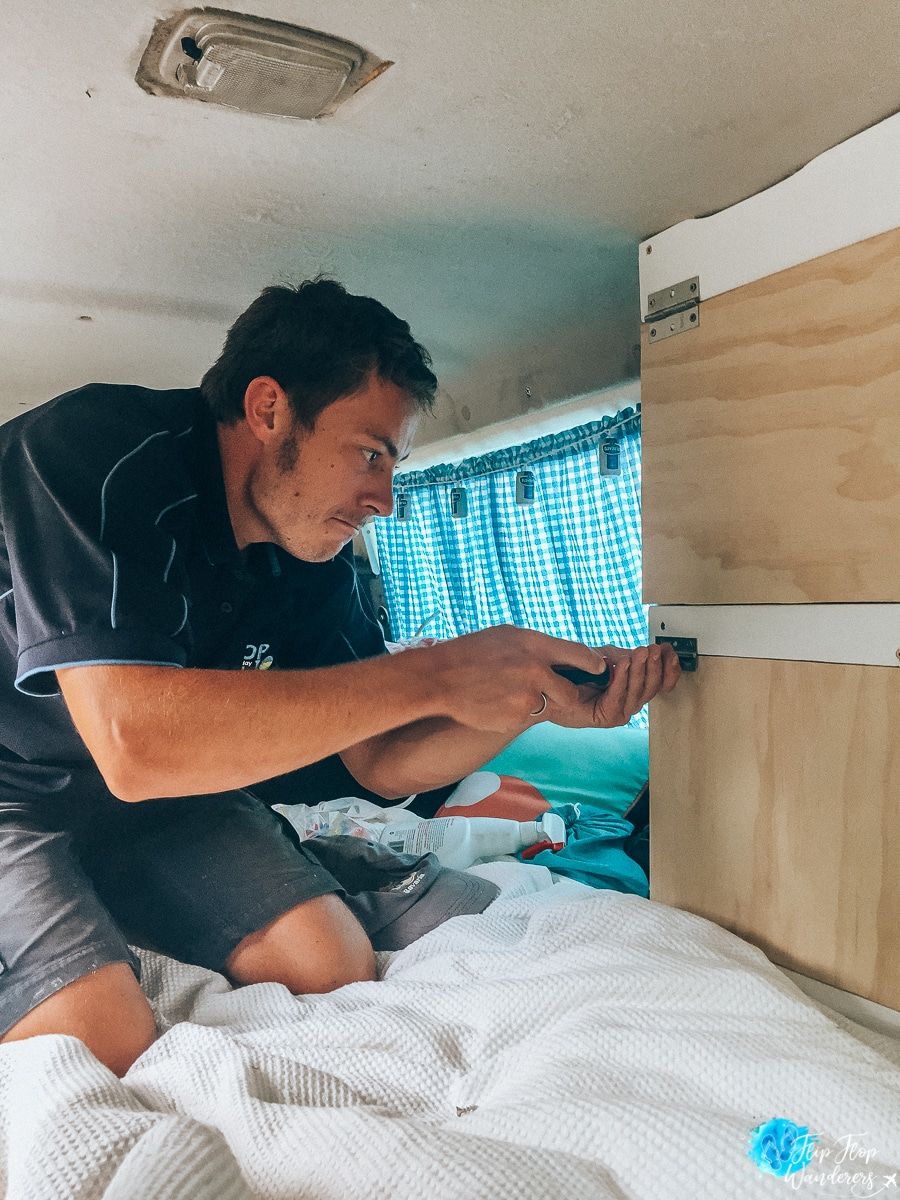
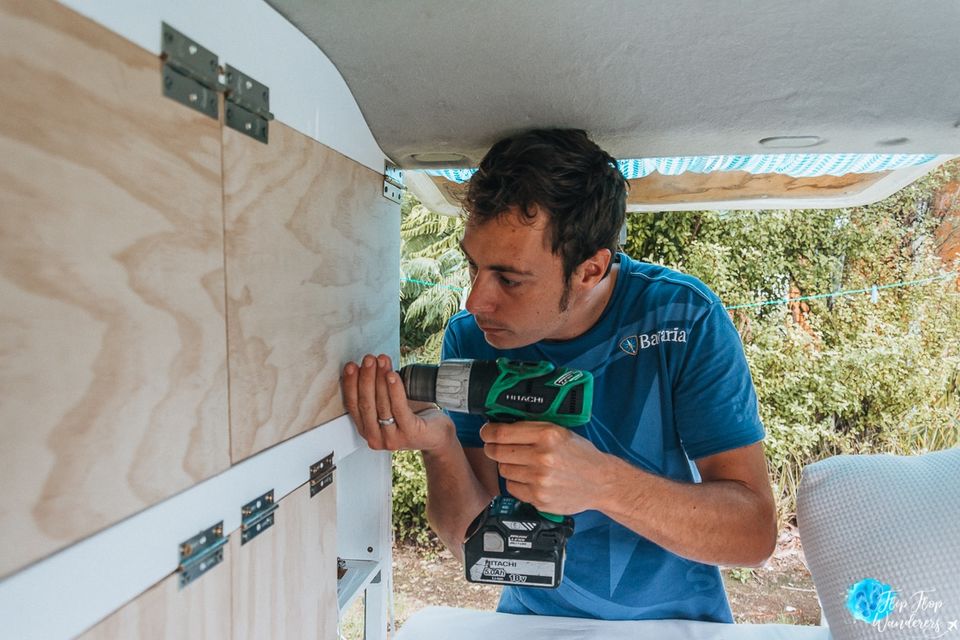
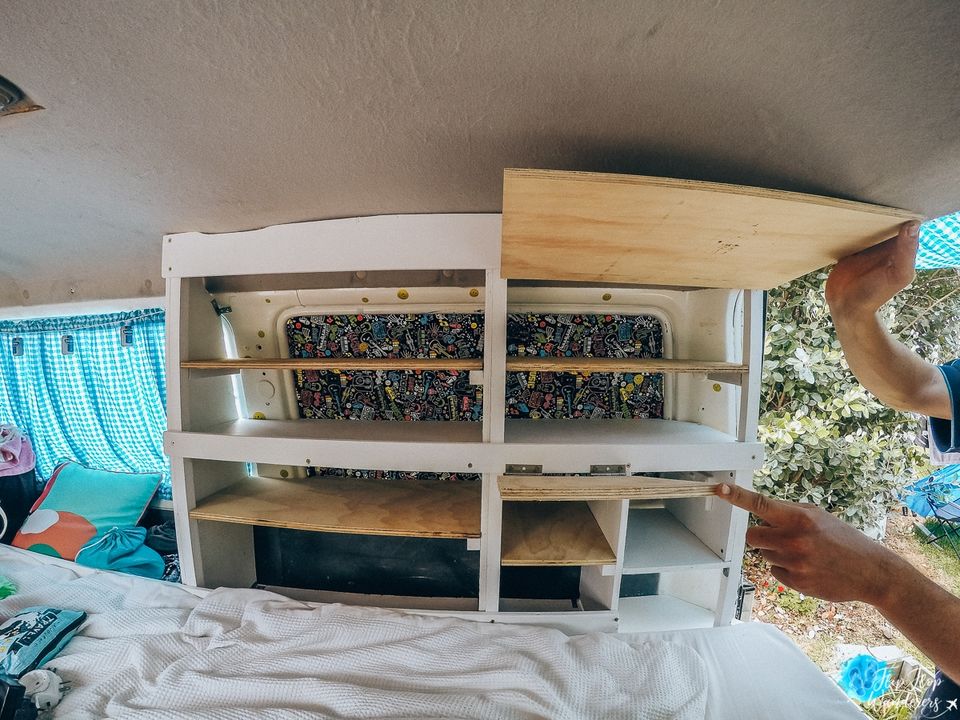
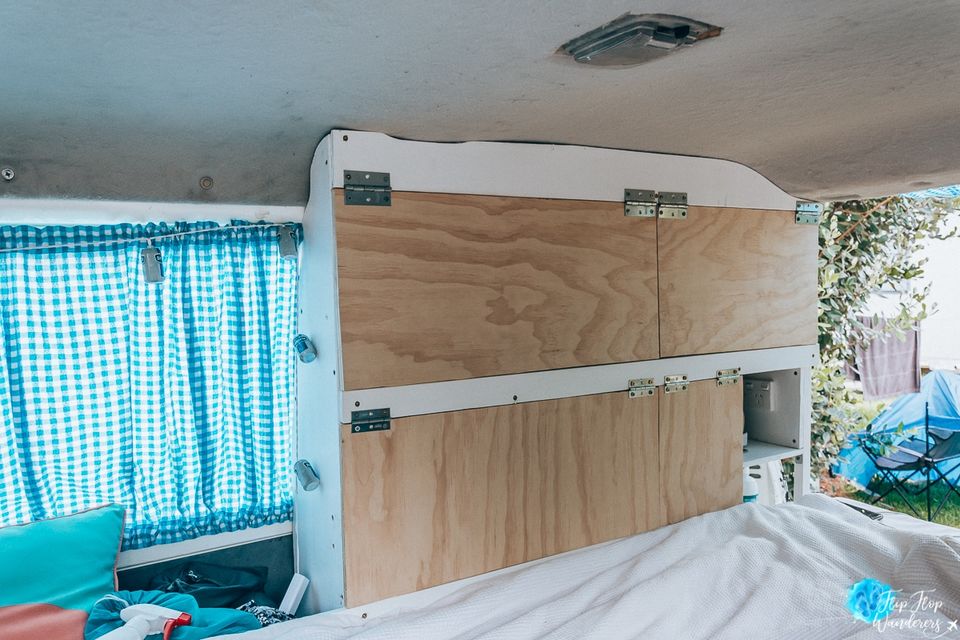
The cabinets:
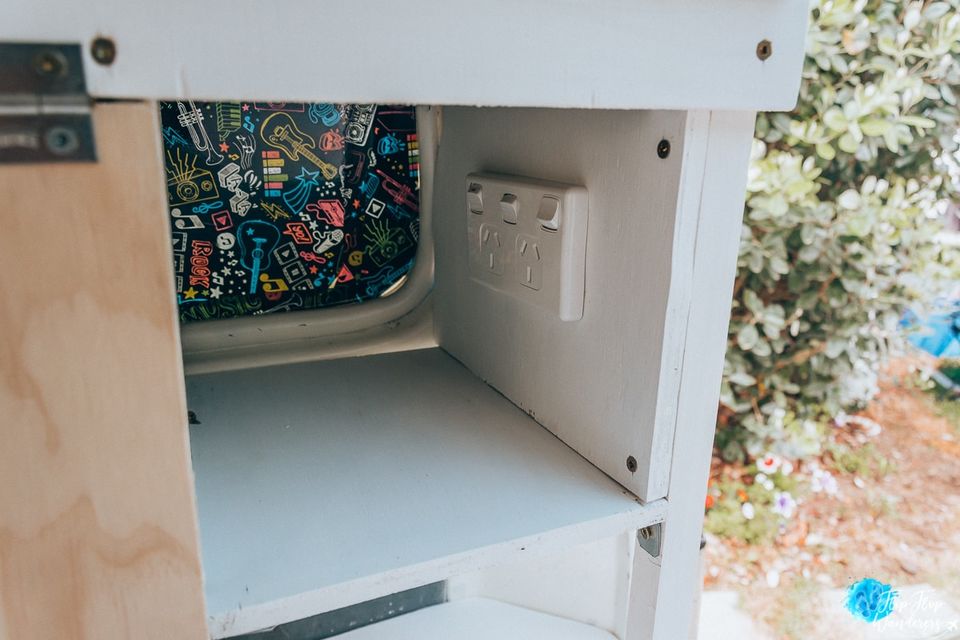
On one side of the bed, we made cabinets, covering one side-window. We kept that window blinded, so you won't see the cabinets from the outside. We also wanted a small bedside cabinet to charge the phone and such, so we made some open shelving for that use. The rest of the space is divided into 4 cabinets with all 2 shelves. They have hinged doors with sliding pins to keep them locked when we're driving.
We made the frame from the cabinets of 24mm beams and the shelving, sides, and doors from 12mm plywood.
We also thought it would be handy to have a power point in the kitchenette and in the small bedside cabinet, so we prepared some cables for that before making the cabinets, but we will tell you more about that in the next step.
Costs of the cabinets:
200 NZD
How long did it take to make:
12 hours (2-3 days)
See here the progress of building the cabinets:
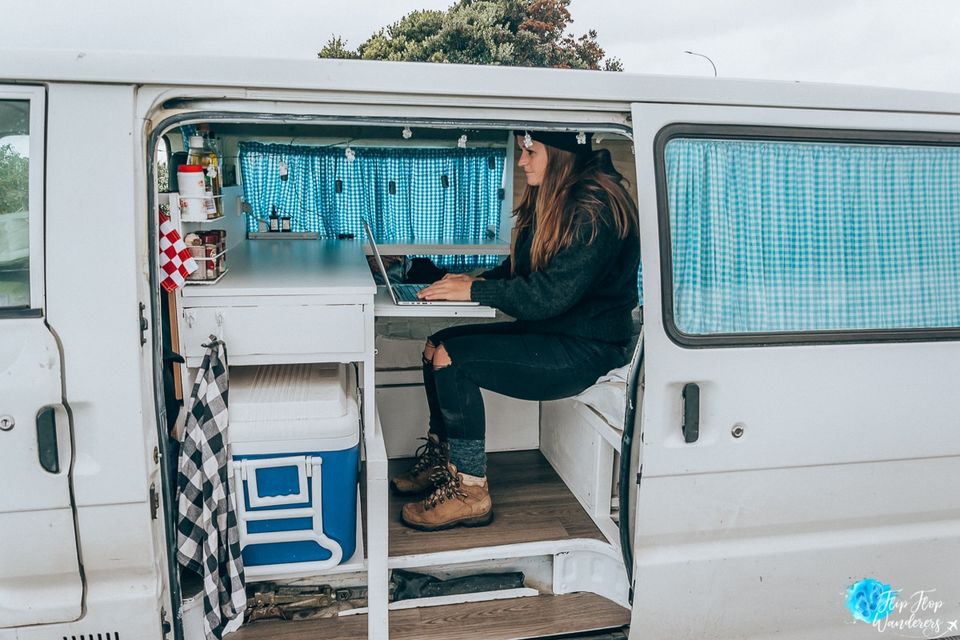
The kitchenette:
At the end of our bed, behind the front seats, is where we made our kitchenette. There are many options for the kitchen to think of: Do you want a sink and some water and wastewater reservoirs? Do you want a cool box or a fridge? And do you want to cook inside?
A fridge would come in very handy, but then you need a second battery too, so we decided to stick with a cool box (esky/chilly bin).
Firstly, there was some space left behind our cabinets under the side window, so we decided to make a little cabinet there with a bench top.
After that, we built the frame for the kitchen from 24mm wooden beams and we made the sides and some shelves from 9mm and 12mm plywood. We also made a back wall against the front seats to make it solid from 12mm plywood. On top of the frame, we built a bench top made of melamine panels which are nice and smooth.
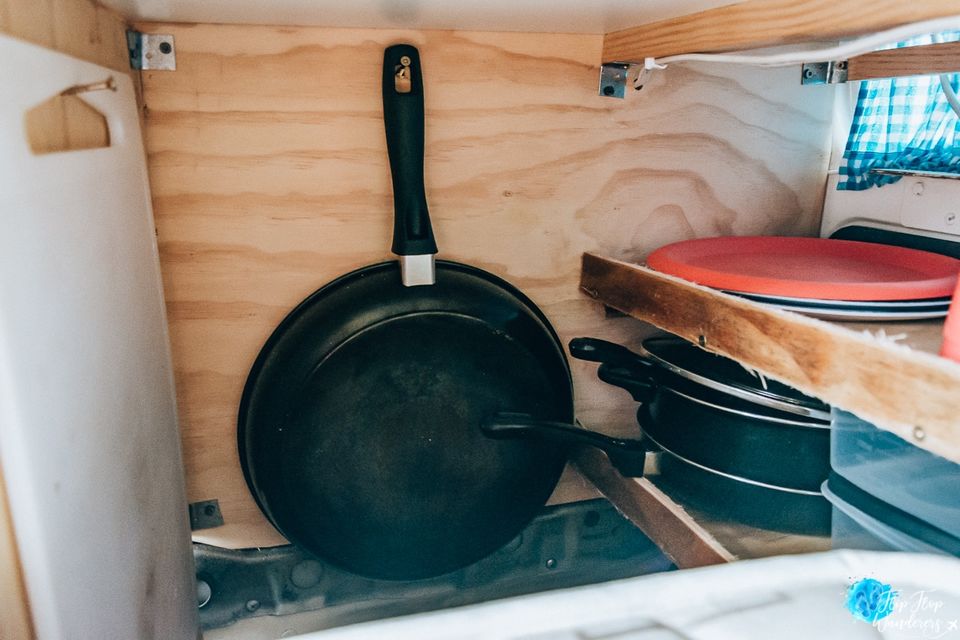
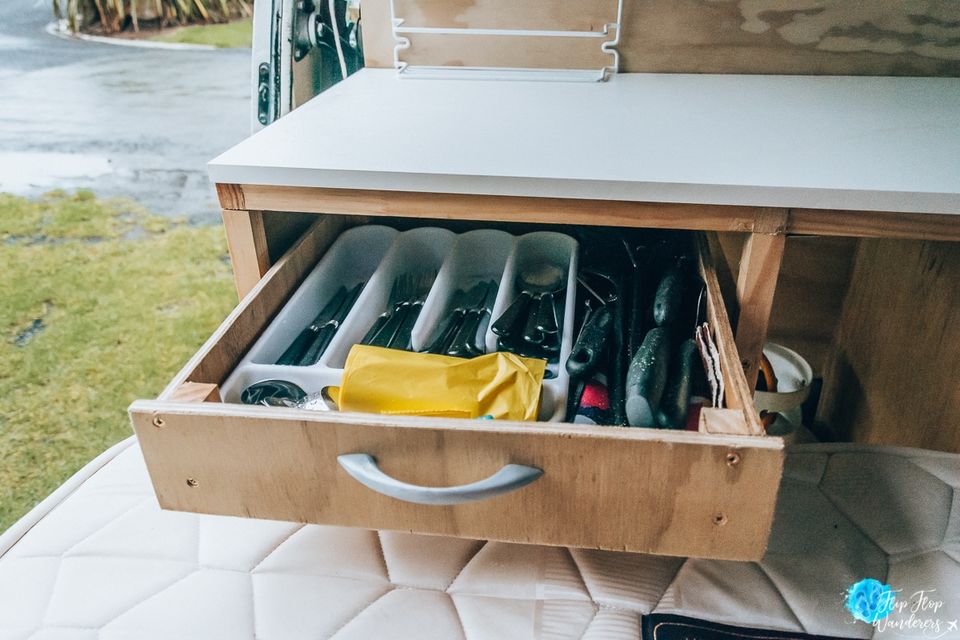
As for storage space, our kitchenette is divided into two main parts. The part in the back corner is used as a storage room for food, pots, pans, plates, cups etc. The part at the door side is used for our cool box. We placed our cool box on a sliding platform which slides out of the door. Behind the cool box is a bit more room where we placed our gas bottle. Above the cool box, we made a cutlery and utensils drawer and a small sliding table. Next to that, there was still a little room for a small cabinet.
For cooking we use a portable stove. We always cook outside but you can also place it on top of the kitchen bench.
Costs of the kitchenette:
300 NZD
How long did it take to make:
12 hours (2 days)
Step 9. The basics
Now you know how to build your interior, there are a few more things that need to be taken care off:
1. Power
As mentioned above, this might need to be looked at before building everything up. We chose to make some power points inside. We have one next to the bed and one at the kitchenette. Therefore we pulled a cable underneath the cabinets. We have a lead coming out the back of our van to plug into power. If you make it like this, you need to check what the rules are in the country your building it because sometimes you are not allowed to do this yourself.
We also have a power bank to charge our phones when we do not have power. Another option is to install some solar panels and a second battery so you can charge everything. Depending on how long you stay this might be worth investing.
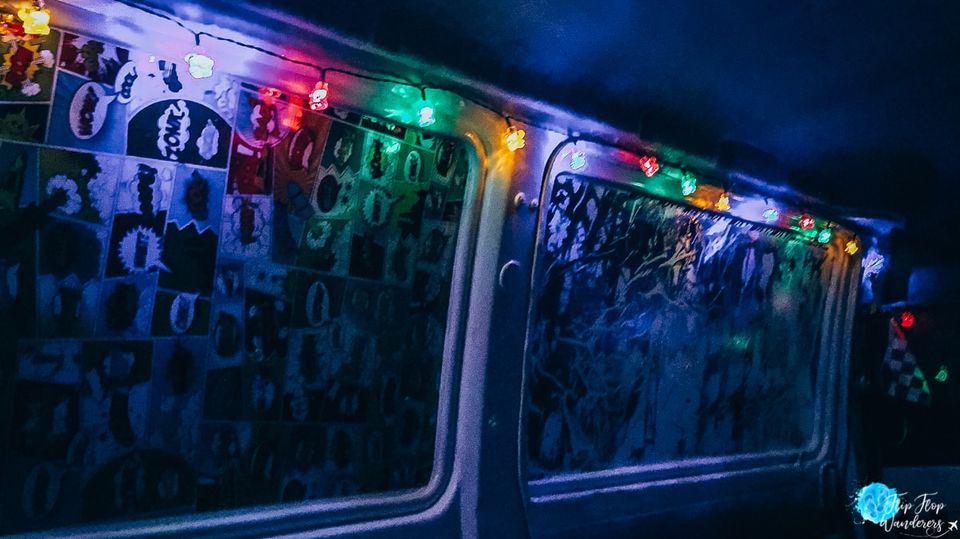
2. Lights
It's also important to have lights inside. Our van is fitted with enough lights to light up the desert at night ???? We bought a Christmas light cord with nice colors for a cozy atmosphere. We also have a led strip for when we need good lighting, it is really bright! Those are on power, but we also have some push lights that work on batteries for when we don't use power.
3. Water
If you choose for a sink you need water too. You can do this with removable water tanks, but you can also make some water hoses. You might need to look at this before building up the kitchen!
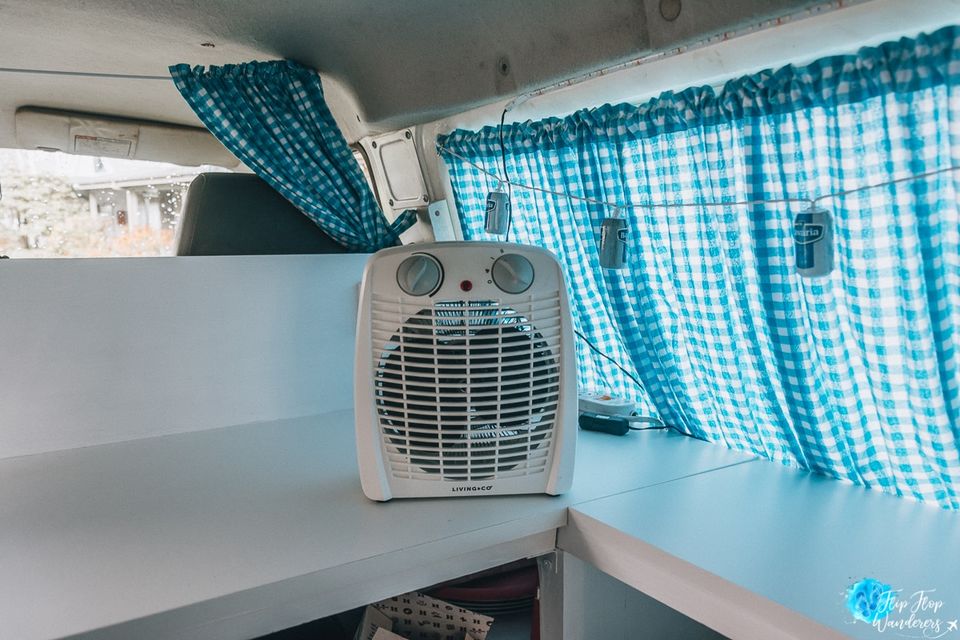
4. Ventilation
Ventilation is also very important. You will need to be able to breathe inside the van ???? Some vans ventilate itself through the window framing. So does ours, so we didn't really need ventilation. At night we open up the front windows a bit. Also, depending on the weather you might need a heater or a fan too. Now that it gets cold here in New Zealand, we definitely needed a heater or something to keep us warm during the chilly nights. That's why we bought a small electric heater, which is already very worth its money!
Costs of the basics:
250 NZD
How long did it take to make:
2 hours
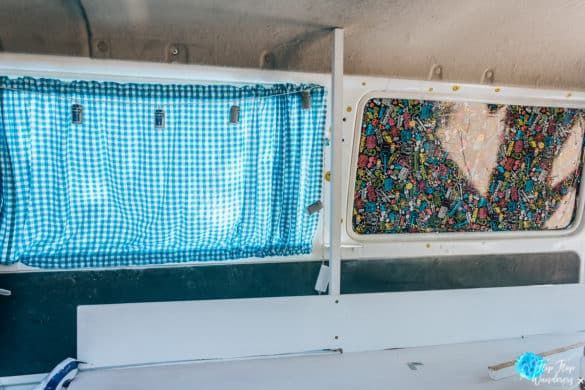
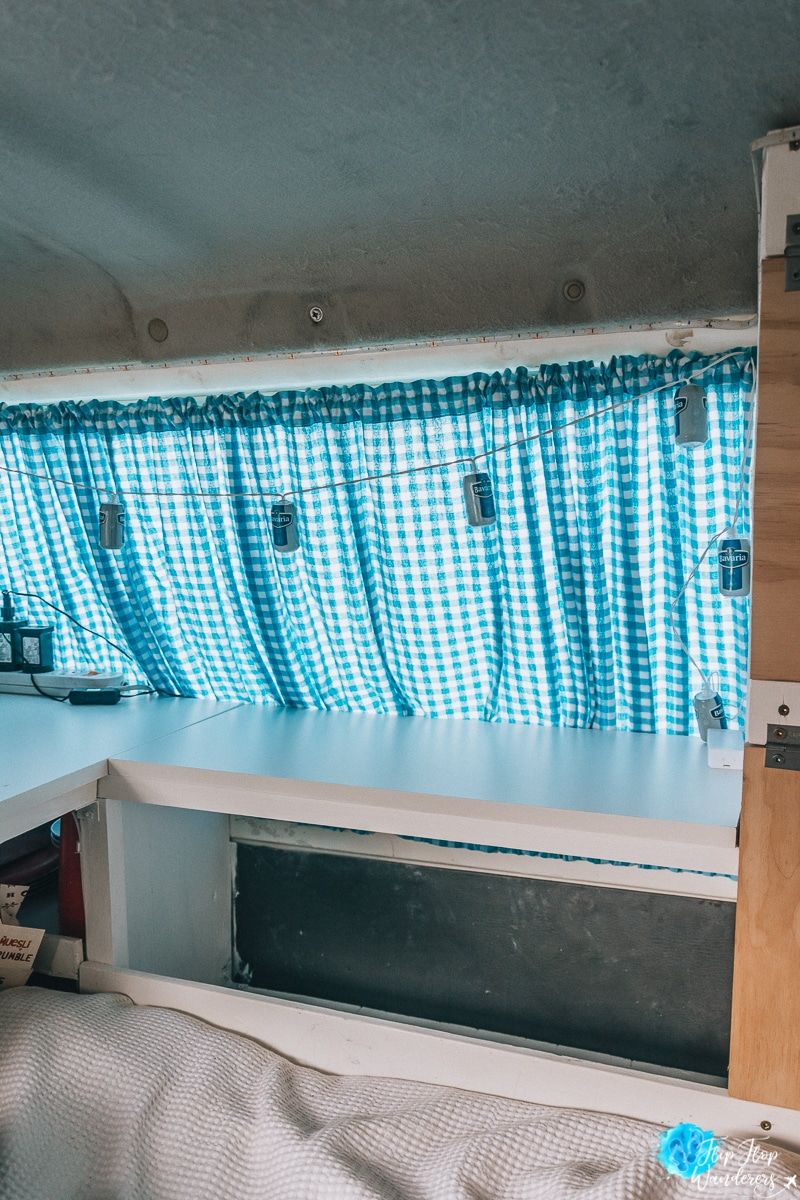
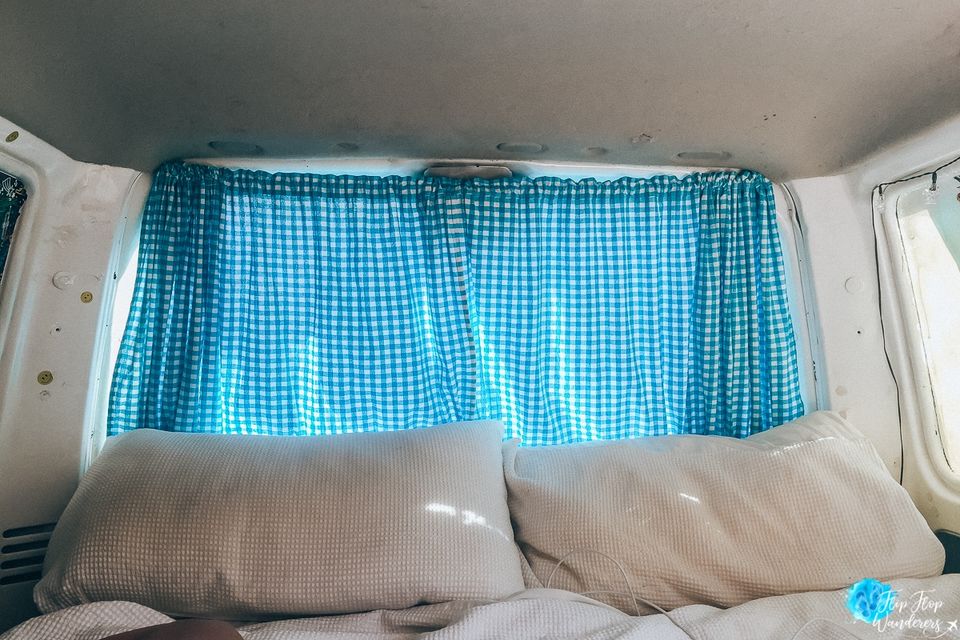
Step 10. Make your own curtains
You definitely want privacy in your van, so you might need some curtains. When we bought our van, all back windows where blinded. We removed all this blinding and hanged up some curtains instead.Since we didn't have a sewing machine and we are not really handy with it either, we were really lucky that Manon's mom loves to do it. We measured the windows and she made the curtains and send them to us, all the way to New Zealand ???? She did it really professional, but if you're a bit handy with a needle and stitch and don't need to have it too neat, then it isn't too hard. We used a special wire as a curtain rail which was really easy to install. Check out the building suppliers or warehouses for something like this.
Costs of the curtains:
70 NZD
How long did it take to make:
12 hours (2 days)
Step 11. Buy all the essentials
So now your van is done! You only need to buy all the essentials, or you might have bought some already, which is a good way to make sure it will fit in the cabinets.
This is a list of things you (might) need:
- Mattress
- Linnen / Sheets
- Coolbox (chilly bin/esky) or a fridge
- Pots and pans
- Plates, cups and bowls
- Cutlery and utensils
- Stove
- Gas bottle
- Camping chairs
- Camping table
Of course, there are many more things you might want to have in your van, but these are just the essentials.
Costs of the essentials:
500 NZD
Step 12. Finishing touches & decorate
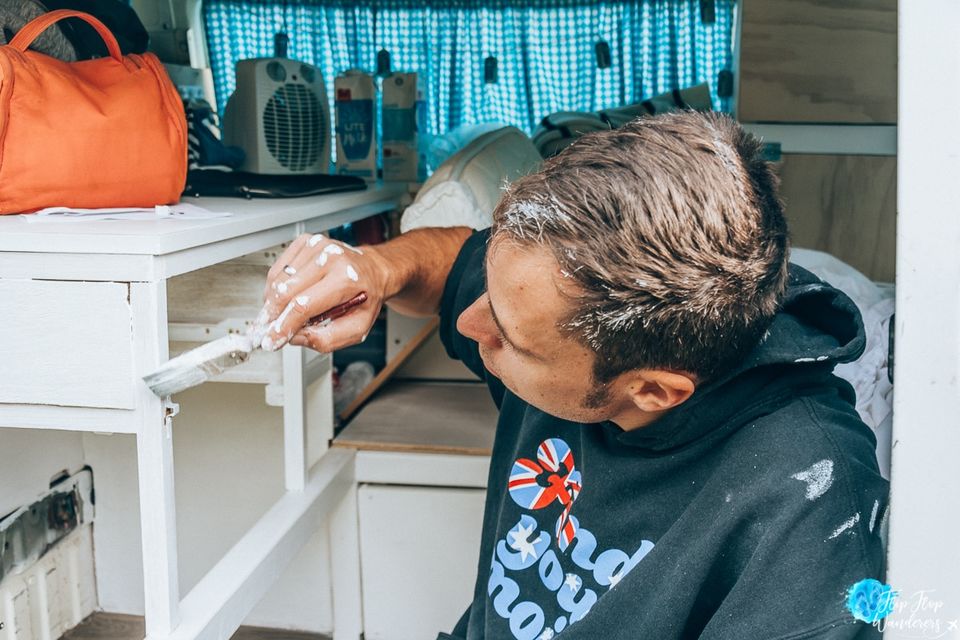
Last thing that's left is making your van feel like home! The fun part! Paint it, hang up some organizers and racks, decorate it with photos or posters or flags. You will probably continue doing so the whole trip because a house will never be finished ????
For example, we bought a nice spice rack, a cute cushion, a scented candle and some cozy lights. We also painted all the woodworks.
Oh and remember: don't cram your van too full with stuff, because we learned that it can make your van too messy. Best to keep it simple because that way it feels much bigger!
Costs of decorations:
75 NZD
Essential tools for your campervan conversion
While you don't need many tools to build your own van, there are some tools that you definitely need for you DIY van:
- Handsaw
- Jigsaw
- Screwdriver
- Small mechanic’s toolset
- Silicon sealant
- Tape measure
- Carpenter’s square
- Spirit level
- Paintbrush
Non-essential (but good to have) tools:
- Skill saw
- Hammer
- Cordless drill and drill bits
Recommended products for a campervan conversion
Besides the essentials you'll definitely need in your van, there are also some products which are not really essential to have, but which we still recommend:
- Kitchen sink (if you do decide to build this)
- Fan for the hot nights
- Small heater for the cold nights
- Hanging shoe storage
- Back seat organizer
- Sunshades
- Bug screen
- Car Jump leads
- First Aid Kit
- Mini dustpan and brush set
- Cleaning set
Total costs of a campervan conversion
We made a rough sum of all the costs for our van. There might be some extra costs for repairs sometimes like we had to fix the radio and the 12V charger. After a while, you will need to service it, and do some maintenance, extend the registration and renew the warrant of fitness. But that isn't different with a van that's already made up. The price below is way cheaper than most already-build vans we saw on the web, and they were older and have more mileage. The best thing about building one yourself is that you will probably be able to sell it with profit!
Van: 4250 NZD
Cleaning: 20 NZD
Flooring: 100 NZD
Foundation: 150 NZD
Bed & drawers: 150 NZD
Cabinets: 200 NZD
Kitchen: 300 NZD
Basics: 250 NZD
Curtains: 70 NZD
Essentials: 500 NZD
Decorating: 75 NZD
Total: 6.065 NZD
Note: these prices are in NZD because we built our van in New Zealand. Converted to USD the total price would be $4200 USD. Also note that New Zealand is a really expensive country and some parts and essentials were pretty hard to get, so in other countries it will probably be even cheaper than where we did it!
So it will take some time & effort, but afterwards, you will have the van you always wanted and it is a great experience too! You can drive around with pride, and you can tell everyone that likes your van that you built it yourself!
~
We hope you really learned something from this step-by-step guide and of course we hope you're gonna use it when you're gonna build your own campervan! Let us know if you do and how it goes! And don't forget to send some photos with it ????
This blog was originally published on Flip Flop Wanderers.