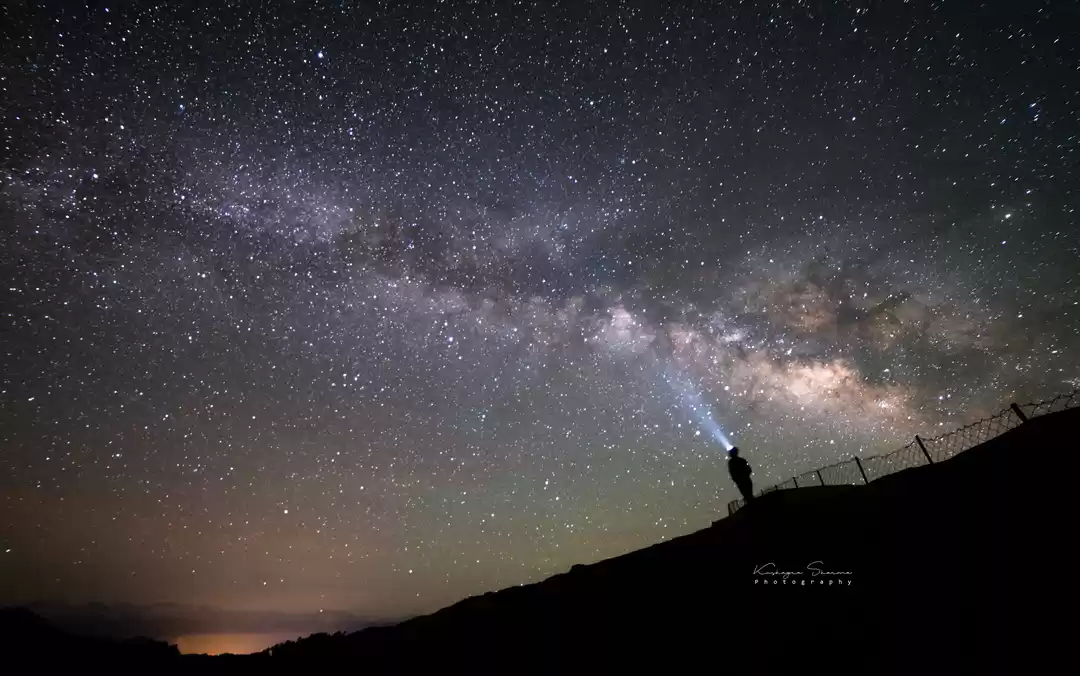

Nine years ago, when I started with photography, photos of Milkyway always fascinated me. A device (DSLR) invented by humans which have the power to capture the great Milkyway excited me even more. It always made me think that Milkyway was not visible in India, but when I started studying about Milkyway photography I got to know that our Earth is a part of Milkyway Galaxy, and it is visible from everywhere. It is true you cannot shoot milky way all year around; there are certain time slots when the “Core” of Milkyway is visible in certain parts of Earth. In Maharashtra, the best time to Shoot Milkyway starts from March and ends in June as it gets cloudy.
As I started to explore Milkyway Photography I realised that shooting Milkyway was not as easy as I thought. There is a strict workflow you need to follow if you want to capture Milkyway. At the start it was all Rocket science for me but as I started to explore I realised anyone can capture Milkyway if you follow the workflow.
So I have tried my best to list down the workflow and techniques to capture Milkyway in India.
EQUIPMENT NEEDED:
1) Camera
Milkyway Photography is categorized under long exposure photography, which simply means, you need a camera which allows you to open the shutter for a longer duration. Thus, you need a camera which allows you to shoot in Manual Mode, giving you 100% control over your camera settings. We personally prefer using 25 to 30seconds shutter speed to get good details of Milkyway.
2) Lens
A fast, super wide angle lens (f/2.8 or lesser) with infinity focus is a great equipment to capture the fine details of Milkyway. If you are not able to find a fast lens with infinity focus you can always shoot with your kit lens at f/3.5. You simply have to autofocus on a far distance light source and then convert it into Manual Focus. If you keep your lens on Auto Focus mode it won’t be able to focus, thus, always keep it in Manual mode. Always zoom in the photos and check whether the stars are in sharp focus or not.
3) Tripod
Any good sturdy tripod is suitable for Milk way Photography. As the shutter is going to be open for more than 20 seconds, we have to make sure there is no camera shake.
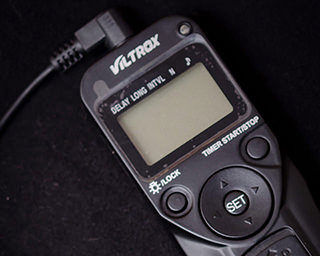
4) Shutter Release Remote/Cable:
Wired or wireless shutter release cable is used by many Night Sky photographers as it helps to reduce the camera shake when you press the shutter button. If you don’t have shutter release cable, you can switch your camera to self-timer mode and press the button which will help to avoid the unwanted shake. There are two types of gear available in market one is called Intervalometer, and another is shutter release cable which is cheaper compared to an intervalometer.
5) Weather
Always look for clear sky. In cloudy conditions, the Milkyway will get covered by the clouds.
6) Location
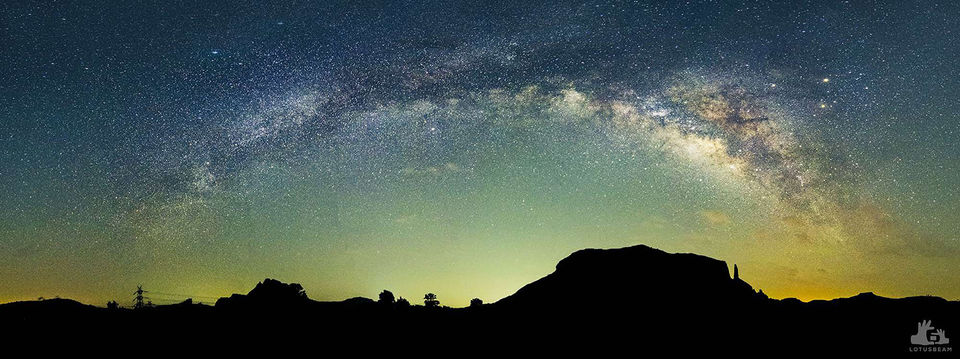
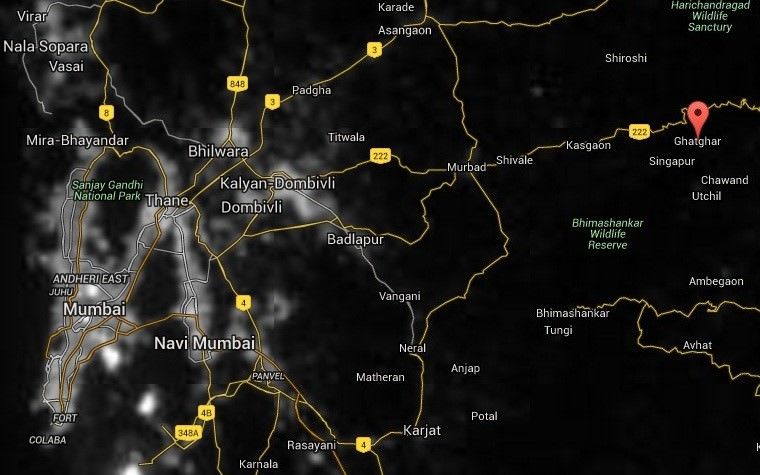
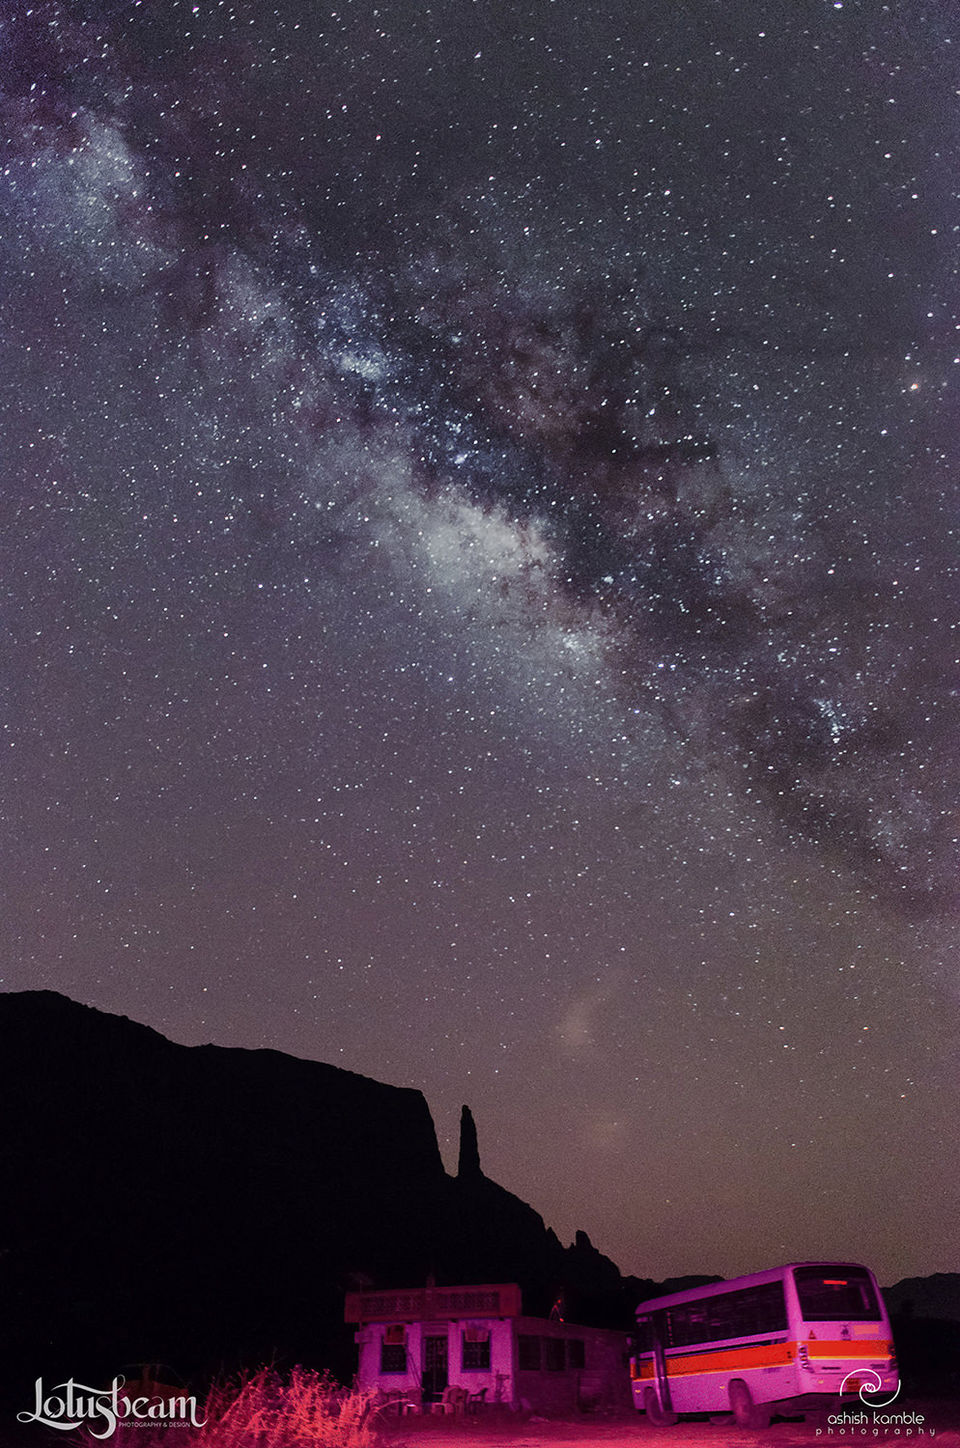
When it comes to Milkyway Photography, a Dark Sky is the most suitable place. A dark sky is a place which is away from Light Pollution. Lesser the light pollution clearer the sky looks. We shoot a lot in Naneghat, which is close to Ghatgar. The Dark Sky Map is divided into two different color patches, i.e. grey and the black patch. The grey patches represent the light polluted areas which you have to avoid, and dark patches represent the Dark Sky. With the help of this map, you can find your own Dark Sky.
7) Software
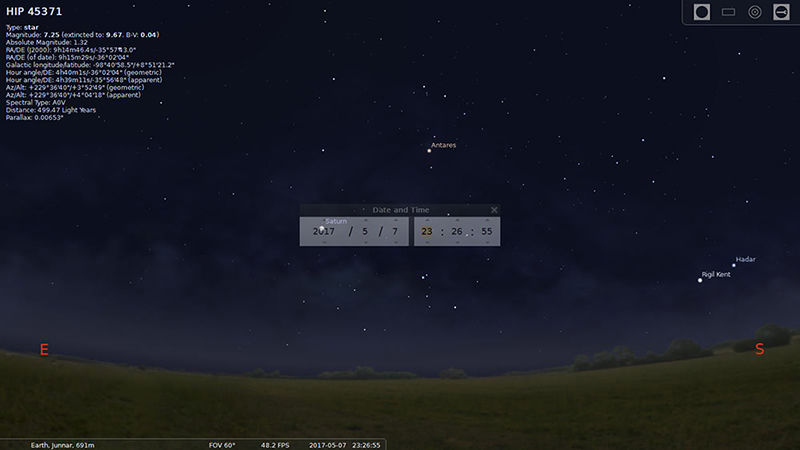
With the advancement in technology, you have many different apps and software to locate the position of Milkyway. We personally use ‘Stellarium’ as it is very precise and free. The moment you type your location the software will align according to your location. You can change the Date and Time and see the position of Milkyway on that given Date and Time. It usually rises between South and East from Naneghat.
CAMERA EXPOSURE:
1) Aperture
f/2.8 with infinity focus gives the best result. Bigger the aperture opening more light will enter. Thus, always keep the widest lens opening available on your lens. If you are using your kit lens, use f/3.5.
2)ISO
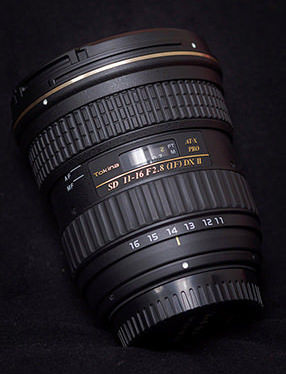
As we will be shooting under Dark Sky, we have to boost our ISO to minimum 1250 or 1600 depending upon the sensitivity of your DSLR sensor. The Maximum ISO we used till now is 6400 on Nikon D7000 with Tokina 11-16mm shot at f/2.8.
3)Shutter Speed
There is a calculation rule called ‘500 Rule’ which means you have to divide 500 by the focal length of your lens, and you get the required shutter speed. This Rule is followed to avoid Startrails in your Milkyway Photos. We personally prefer the trial and error method to get the best result for our photos. We use a shutter speed of 25 or 30seconds for our photos.
4)White Balance
We always shoot in Auto Mode and then finalise the colors in Post processing.
This post was originally published on LOTUSBEAM
Frequent Searches Leading To This Page:-
milky way rise time india, best time to see milky way in india, milky way from india, milky way in india, milky way india, milky way in maharashtra, milky way from mumbai