"Wow, wow, wow! I did it. What an incredibly tough day it was but I am so, so happy and grateful that I officially made it to the base camp of Mount Everest!"
These are literally the words that I wrote down in my personal diary the day I made it to Everest Base Camp. Ok, they are slightly over-dramatic, but you get the point right?
14 days, 160km covered, 2615km ascended, 5365m altitude reached, 50% oxygen levels withstood, temperatures down to -15°c endured.
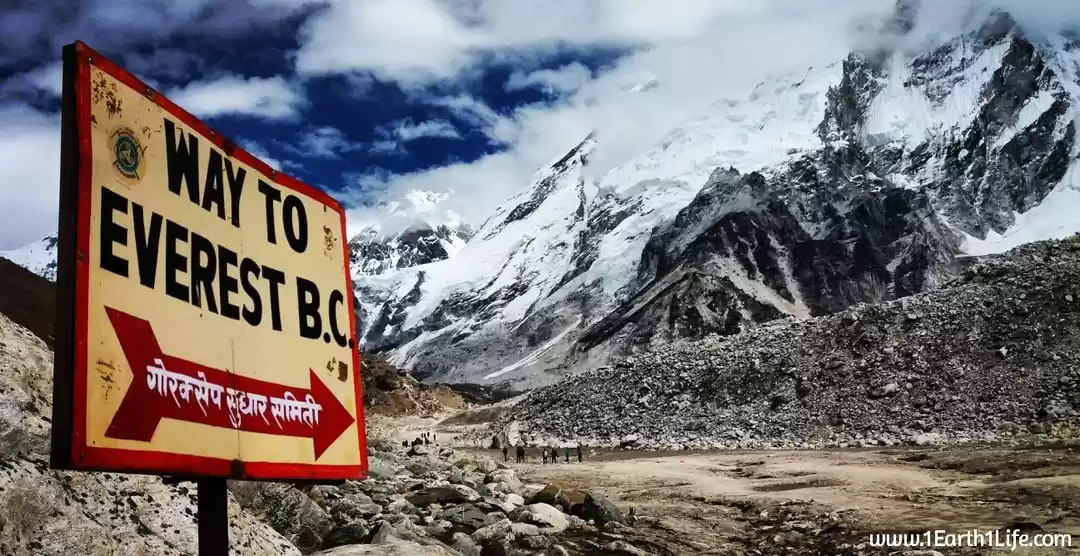
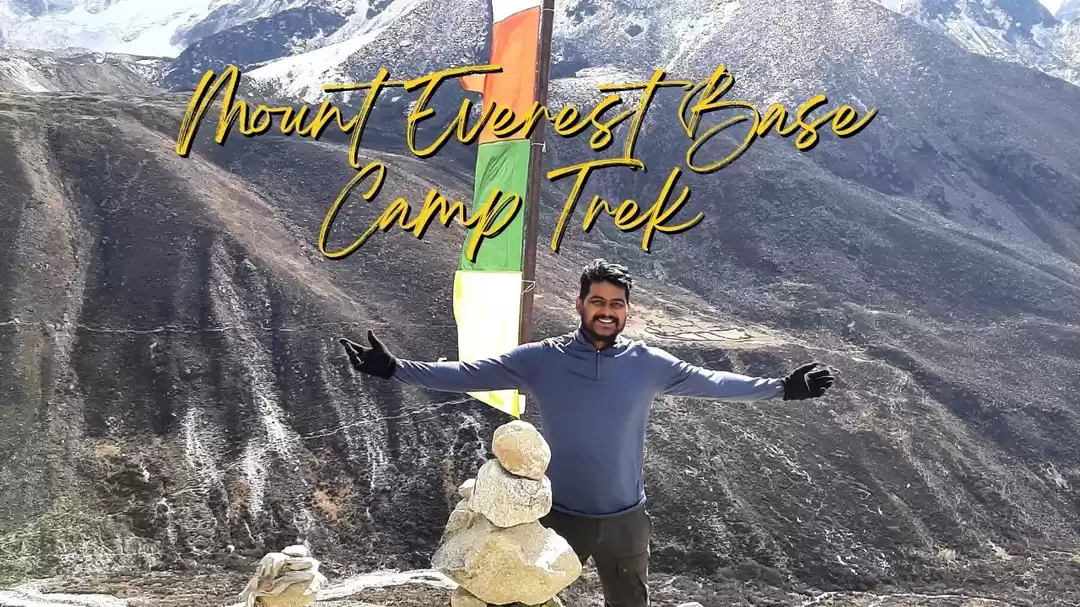
This is the Everest Base Camp (EBC) trek.
But don’t be put off. With the right equipment (details to follow), the knowledge of an experienced guide at your side and with an adventure-seeking spirit, anyone can complete this spectacular trek to the base of the Earth’s tallest peak.
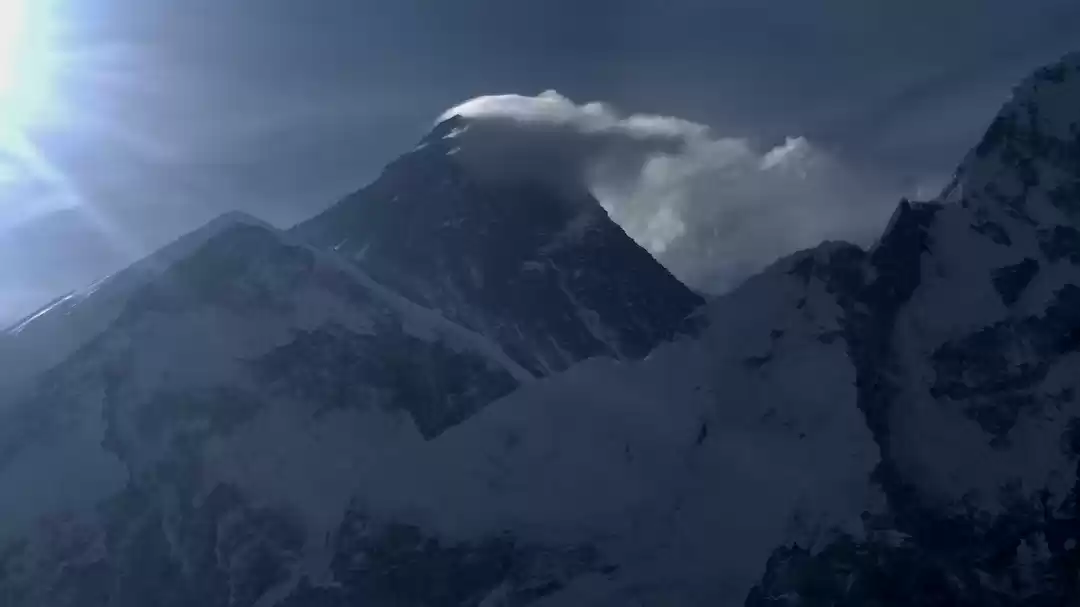
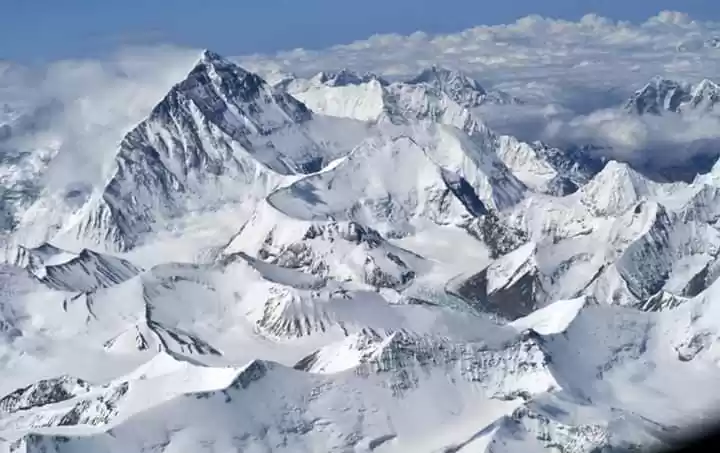
Nestled amongst the vast Himalayan mountain range, straddling the borders of Nepal and Tibet stands the mighty Mount Everest. The holy grail for many mountaineers, climbers and bucket-list enthusiasts. The privilege of getting up close and personal with this wonder of nature was once reserved for an elite few of experienced and wealthy adventurers. Not anymore. Nowadays, reaching EBC is not only achievable physically but with a multitude of travel companies offering deals to get you to EBC, its affordable too.
Booking your trek
Booking way in advance is not necessary. For the more laid back traveller, booking your trek after arriving in Kathmandu shouldn’t be a problem. For those who like the peace of mind of knowing that everything is sorted before arrival, like I did, then a quick search on Google will provide you with plenty of choice.
I picked a few local companies and sent out e-mails. After a few exchanges with a couple of companies I settled with Green Valley Nepal Treks. Their EBC package took care of everything on the 14 day trek and included a pick up and drop off at Kathmandu Airport and 3 nights’ accommodation in Thamel, the tourist hub of Kathmandu, at the price of $1047 USD or 70,000 rupees. I had the chance to meet my guide Gopi, a lovely and highly experienced local Nepalese man, a couple of days before my trek started which was great as the thought of spending 14 days with a complete stranger made me a little bit nervous!
Best time to visit
It's possible to complete the trek all-year around however there is an off peak season (November – January and June-August) and a peak season (February – May and September – October). I started my trek at the end of October, a great time to trek.
The equipment you’ll need
You need to come well-prepared. The weather conditions and the terrain on the EBC trek can be challenging so having appropriate equipment is a must. A pair of strong, comfortable and preferably water-proof walking boots is essential. A comfy day-pack (25-35L is good), a light, water-proof jacket, a fleece, 3 dry-fit t-shirts, 2 warm base layers, 2 pairs of trousers (one water-proof and one thermal-lined), a few pairs of thick socks, a warm hat and gloves, a balaclava that covers your nose and mouth as it can be very dusty, sunglasses to prevent sun or snow blindness and factor 30+ sun cream. You may also want to bring a couple of packs of baby wipes as toilet paper is a luxury on the trek and they also come in handy to freshen up when you don’t quite fancy a freezing shower in sub-zero temperatures!

Whilst every piece of a gear a trekker could dream of can be picked up in Thamel I personally would recommend buying the essentials from an authentic retailer before you head off on your trip. Whilst they may be cheaper in Thamel they are mostly knock-offs of brands and therefore aren’t of the same quality (North Fake, anyone?) I did rent my down jacket and my sleeping bag from one of the many rental places in Thamel for around $1 or 70 rupees per day.
The trek
Day 1 of your trek starts with an early journey into the small Himalayan town of Lukla, the gateway to the EBC. This is a heart-stopping, thrill-seeking adventure in its own right. Dubbed ‘the world’s most dangerous airport’ due to its runway off the edge of a steep cliff, this short, yet highly memorable 30-minute flight to Lukla Airport is guaranteed to distract your nerves away from the trek at hand. If you’re able to, sit on the left side of the plane to catch your first glimpse of the Himalayan mountains. This stunning scenery is sure to answer the question that’s bound to be racing through your mind, ‘why am I doing this again?!?!’
Once you’ve recovered from that experience the trek begins with a 3 hour easy going trek to Phadking reaching 2800m altitude.

Day 2 begins with an easy-moderate 3-hour trek to your lunch stop. From here the fun really starts. For the next 3 hours you will trek on a constant steep incline. Just when you start to feel as though your legs have escaped on the next flight back to Kathmandu you’ll catch your first glimpse of Mount Everest in the distance and you’ll quickly forget about the last 3 hours of torture. You’ll end day 2 at Namche Bazaar, a lively and populated mountain village at 3500m.
Day 3 is a ‘rest day’ or ‘acclimatization day’. If you think you get to put your feet up and relax, think again. After an optional visit to a museum of Sherpa culture (the name given to those who live in the mountains) it’s a 1 ½ hour steep climb to The Mountain Viewpoint Hotel for an incredible view of Mount Everest.

On Day 4 the trek really starts to get challenging. The first 2 ½ hours is pretty flat, winding around mountains with a big descent down to the river. You’ll lose quite a bit of altitude in this part and spend the next 3 hours making up for it. This was probably the toughest part of the trek but the view that awaits you at the top at Tengbouche is unbelievable.
On Day 5 you’ll reach 4000m and the terrain will change as you reach Dingbouche. It’ll be much colder during the day and you’ll need your down jacket from this point.

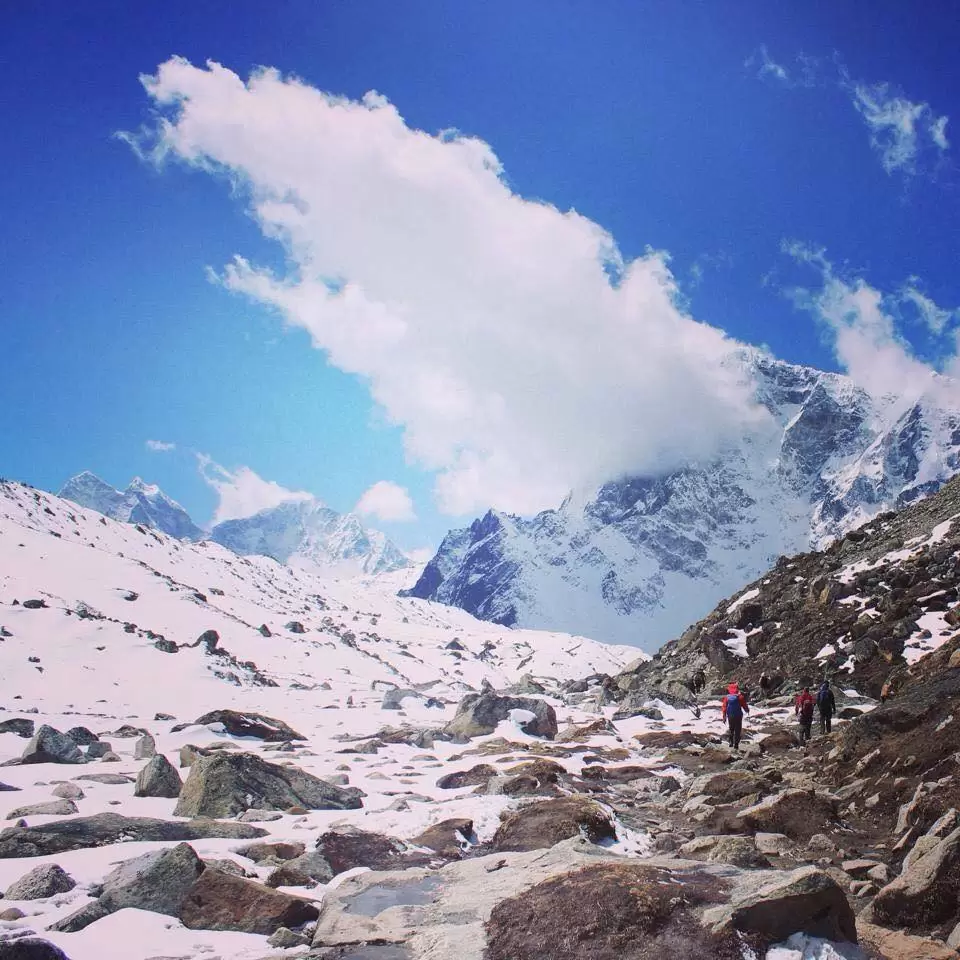
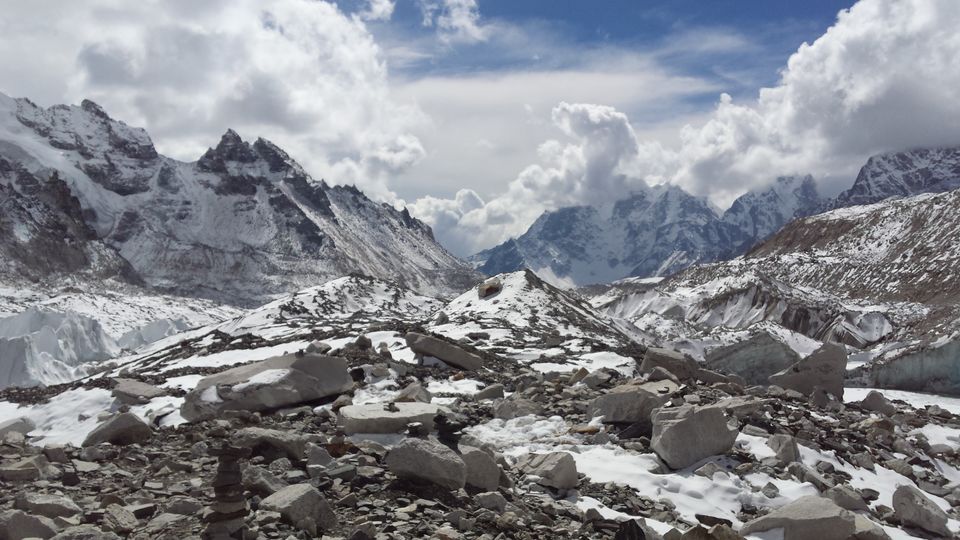
Day 6 and you’re now trekking through the harsh wilderness of the Himalayas on your way to Lobuche. There’s snow, there’s ice and there’s not much around besides Mother Nature in all her magnificent glory. At just below 5000m, the trek is tough, and each step feels like a greater effort. What’ll keep you going is the thought that in less than 24 hours you’ll be standing at EBC.
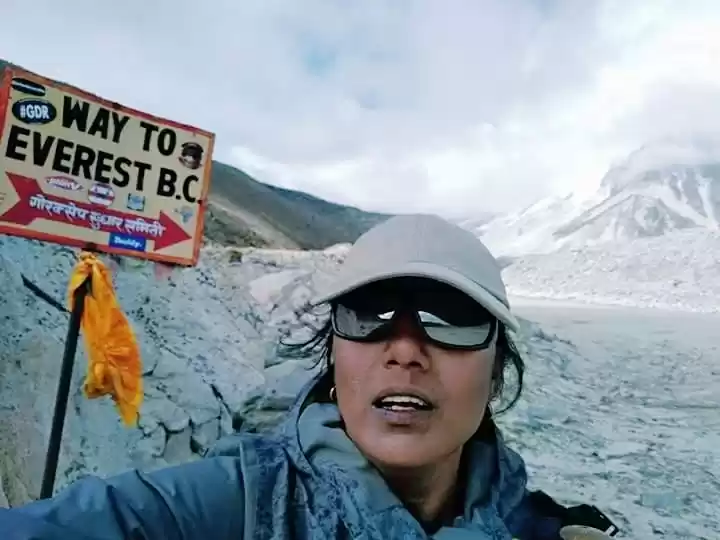
Day 7 is the big one. You start early and trek 2 ½ hours to Gorakshep. From here you're roughly 2 hours from EBC. Here I can remember only 2 things. The first being how completely quiet and still everything was around me and the second being the fact I was running on nothing but pure adrenaline. And then there I was.
Take in every single blissful breath and revel in your massive accomplishment. Oh, and don't forget to take a cheeky selfie next to the EBC sign!
Day 8 through to Day 14 you be making your way back down to Lukla via some tiny mountain villages of Dangbouche, Pangbouche, Phortse and then back to Namche Bazaar where from here you'll lap the first part of your trek on the way up. I found myself relaxing a lot more on the trek back. I even treated myself to a couple of *lukewarm* showers. Absolute heaven.
There will be some crying, but that's okay
Many people fear they aren’t ‘fit enough’ to do the EBC trek. Of course the fitter you feel the more pleasant your trekking experience will be however I saw people of all ages (up to 85!) and all fitness levels complete the trek. Your guide should walk at your pace and the 14 day allows you plenty of time so there’s no need to rush yourself.
The biggest consideration is the risks around trekking at high altitudes. There’s really no way of telling how your body will cope with this and there’s not actually much you can do to prepare for it. The best thing you can do is take it slow and acclimatize properly. Don’t climb too high too fast and if you do notice signs of symptoms (a headache, nausea) descend straight away. This doesn’t necessarily mean you have to abandon your trek completely; it may just be a sign that your body needs more time to get used to the altitude.
The trek is tough. You’ll probably cry, you’ll definitely sweat and there’s a good chance that you’ll shed a little blood (hopefully nothing more serious than a blister). You’ll have moments where you question your sanity and you’ll have moments where you wonder why it took you so long to do it. You’ll be pushed to the limits of your comforts and you’ll feel like you want to give up. But you won’t. You’ll carry on another day because you know that what awaits you each day is reason enough to keep going. You’ll be pushed to the limits of your comfort, and further still. But long after the blisters have healed and the sun burn on your nose has faded, what you’ll feel is an indescribable sense of accomplishment that you did it. And my goodness, that makes it all so worth it.
Frequent Searches Leading To This Page:-
Mount everest climbing cost in indian rupees, i want to climb mount Everest, how to climb mount everest for free, base camp trek